Helping families eat healthier for less

Helping families eat healthier for less

Thursday, February 21, 2013

Julie & Julia Barramundi with Lemon Sauce

Barramundi with Lemon Sauce
 
 
The Oscars are happening this month so Recipe Redux’ theme for February is to pick a food or recipe from a favorite movie. It can be a recent movie or an old classic.

For me, the movie that comes to the top of my list is Julie and Julia that came out in 2009. Meryl Streep was fantastic as Julia Child and Amy Adams played Julie Powell, a young woman who blogged about preparing all 524 of Julia’s recipes in her Mastering the Art of French Cooking cookbook. I believe that this was the first major movie based on a blog. Julie used blogging to motivate herself to test all 524 recipes and to document her progress. The movie gave me a better sense of the challenges that Julia Child faced while she was in Paris in the late 40’s and early 50’s.

The plot is good but it was the food that was the big draw for me. All of the food depicted in the movie makes your mouth water. Julia prepares a wonderful fillet of sole in a lemony butter sauce. I decided to start with this recipe but make it a bit healthier. I substituted barramundi fish for the sole. If you’re not familiar with barramundi, this is a mild white fish that can be found in many markets today. It is a member of the Asian sea bass family. While it doesn’t have as many omega three fatty acids as salmon or sardines, it has more than many other types of fish, about 480 mg per 3-ounce serving.

Barramundi is one my favorite new seafood items. It can be found frozen or fresh in some markets. I found barramundi frozen at my local BJ’s store. If you can’t find it, click here to go to Australis’ web site to find where to buy it in your area. Here is a picture of the package I bought.


Julia Child’s original recipe called for sole, 2 tablespoons butter and 3/4 cup heavy cream. My recipe uses barramundi fish instead of sole. This mild white fish is more affordable, has more protein and more omega three fatty acids than sole. This recipe below also uses a combination of olive oil and butter, fat free half and half instead of heavy cream and uses less salt. And portion sizes are more reasonable. It’s loaded with good nutrition and costs about $2.50 per serving.

Here is a comparison chart of my Barramundi with Lemon Sauce compared with Julia Child's Fillets of Sole Meuniere (found in The Way to Cook, pages 98-99).


Per serving:
Julia Child’s Fillets of Sole Meuniere
Dr. Barb’s Barramundi with Lemon Sauce
Calories
310 kcal
219 kcal
Total Fat
23 g
10 g
Saturated Fat
13 g
3 g
Cholesterol
127 mg
67 mg
Protein
22 g
22 g
Sodium
899 mg
279 mg


Here is the full recipe.
 
Barramundi with Lemon Sauce

Ingredients:
1 tablespoon butter
1 tablespoon olive oil
1 small clove garlic, peeled and minced fine
4 (4-ounce) barramundi fillets, thawed if frozen
1/4 teaspoon salt
1/2 teaspoon fresh-ground black pepper
1/4 cup white wheat flour
3/4 cup fat free or regular half and half
Grated zest of 1/2 lemon
1 tablespoon lemon juice
2 tablespoons chopped fresh parsley

Directions:
Sprinkle the sole with salt and the pepper. Dust the fish fillets with the flour and shake off any excess. Set aside.

In a large nonstick frying pan, melt the butter and olive oil over medium heat. Add garlic and cook one minute. Put the fish in the pan and cook for 3 to 4 minutes. Turn and cook until just done, about 3 minutes longer. Remove the fish from the pan and set aside.

Add the half and half and lemon zest to the pan. Bring to a simmer and cook until starting to thicken, about 2 minutes. Stir in the lemon juice and parsley. Serve the sauce over the fish.

Makes 4 servings

Nutrition Information per Serving (using fat free half and half):
219 calories, 10 g total fat, 3 g saturated fat, 67 mg cholesterol, 1 g dietary fiber, 23 g protein, and 279 mg sodium. One serving of this low cost recipe provides an excellent source of protein and vitamin B-12 and a good source of riboflavin, niacin, and vitamin B-6.

Cost per Serving: $2.51
Pricing Note: all ingredients were at “regular” prices.

Click here to download and print a copy of this recipe.

Here are some preparation photos.


Be sure to check out these other movie favorites. 
get the InLinkz code

Monday, January 21, 2013

Many Predict Cauliflower to be BIG in 2013


Roasted Cauliflower Tabouli Stew

The theme for January for Recipe Redux is to select one or more of the hot new 2013 trends predicted for home or restaurants made for 2013 by “the experts,” and use this trend in a soup, one-pot-meal, crockpot, or whatever.

After reviewing several trend sites, I decided that I wanted to do something with cauliflower. It was mentioned by numerous people. One of my favorite ways to eat cauliflower is to coat it lightly with olive oil and roast it in the oven. Roasting brings out the sweetness. So, for this challenge, I started with one of my favorite cauliflower recipes, Roasted Cauliflower Couscous Boats, where roasted cauliflower is combined with couscous, seasonings and served in romaine lettuce boats.  So, I needed to convert this salad recipe to a one-pot meal.

So, after roasting the cauliflower, I combined it with couscous, chicken, chicken broth, and seasonings to make a roasted Cauliflower Tabouli Stew that can be served as a main course or as a side. It’s then garnished with fresh cilantro leaves and sliced green onion.


Here is the complete recipe.

Roasted Cauliflower Tabouli Stew

Ingredients:

½ large head cauliflower, trimmed, cut into small florets (about 3 cups)
Non-stick cooking spray
1 Tbsp canola oil
1 small onion, peeled and diced
1 clove garlic, peeled and minced
4 cups low sodium chicken broth
1-1/4 cups uncooked couscous
6 oz cooked chicken breast, shredded
2 tsp lemon juice
1 tsp ground black pepper
1 Tbsp curry powder
¼ tsp kosher salt

¼ cup packed fresh cilantro leaves
¼ cup thinly sliced green onions

Directions:
Preheat oven to 375 degrees. Place cauliflower florets in single layer in baking dish and spray with cooking spray. Bake at 375 degrees for about 40 minutes, or until cauliflower is tender and lightly browned. Stir halfway through cooking. Meanwhile, in a large soup pot, heat oil over medium heat. Add onion and cook until tender, about 5 minutes.  Add garlic and chicken broth and bring to a boil. Remove from heat and add couscous and cooked chicken; stir, and cover. Let stand for 5 minutes. Stir in baked cauliflower, lemon juice, pepper, curry powder, and salt. Divide into serving bowls. Garnish each bowl with cilantro and green onions. 

Makes 6 servings (about 6 cups total)

Note: if you don’t care for cilantro, simply substitute fresh parsley instead.

Preparation Tip: While roasting the cauliflower for this recipe, go ahead and roast the whole head, even though you only need half for this recipe. Once roasted, you can eat on the other half as a low-calorie snack or serve it as dinner vegetable.


Nutrition Information per Serving:
250 calories, 5 g total fat, 1 g saturated fat, 28 mg cholesterol, 4 g dietary fiber, 17 g protein, and 239 mg sodium. One serving of this low cost recipe provides an excellent source of protein, niacin, and vitamins C and K1, and a good source of fiber and folate.

Cost per Serving: $1.41
Pricing Note: all ingredients were at “regular” prices except cauliflower which was on sale for $3.00 a head and the chicken breasts on sale for $1.99 a pound (raw).

 Click here to download and print this recipe.


Be sure to check these other sites for other trends and delicious recipes.

get the InLinkz code

Friday, December 21, 2012

Frothy Mexican Hot Chocolate Uses Froth-Making Gadget


Close up of plain skim milk that has been frothed

Frothy Mexican Hot Chocolate

Caffé Frother by Bonjour

The theme for this month’s Recipe Redux is to talk about a favorite kitchen tool. Perhaps this will aid any last minute shoppers who still need to get a gift or two for someone.


My latest favorite gadget is a Caffé Frother by Bonjour. There may be other manufacturers. This tool is so cool. It makes fabulous froth in about a minute. It's almost like magic how it instantly turns skim milk into a thick froth. You can use it to make your favorite coffee/expresso-based drinks, including cappucino, café au lait, Irish coffee, and more. You can also use the frother to make a nonfat topping for desserts. You probably want to add some sweetness to the milk, such as a sugar substitute or a little honey or agave syrup if used as a dessert topping. This frother retails for about $25.

 
Plain skim milk in frother

You fill the special container with about a third of skim milk. Then push up and down on the plunger which adds air to the mixture, trippling the original volume. The frother works with fat free milk which makes it a fun way to enjoy this healthy beverage choice. The milk can be cold out of the refrigerator or heated on a stove top or in the microwave. You can add flavorings to the milk, if desired, such as vanilla extract, brandy, rum, or other liqueurs. The frother would also be great for eggnog this time of year.

My favorite way to use the frother, though, is to make Frothy Mexican Hot Chocolate. Here is the complete recipe.

Frothy Mexican Hot Chocolate
This recipe can be prepared in less than 5 minutes. It’s perfect on a cold morning or evening. One serving is only 142 calories, yet provides an excellent source of calcium and costs only $0.35.

Ingredients:
0.7 to 1.0 ounce Mexican chocolate (tablet, wedge, or powder)
2/3 cup of fat free milk
¼ tsp cinnamon

Directions:
If Mexican chocolate is a tablet or wedge, crush it to make a powder. Combine all ingredients in a microwave-safe bowl. Heat on high power for 1-1/2 minutes, stirring every 30 seconds. (Do not let milk come to a boil.) Transfer mixture to frother and follow frother instructions. Pour into mug. Makes 1 serving. Note: To make more servings, simply multiply ingredients by the number of desired servings.

Nutrition Information per Serving:
142 calories, 3 g total fat, 2 g saturated fat, 3 mg cholesterol, 1 g dietary fiber, 6 g protein, and 69 mg sodium. One serving of this low cost recipe provides an excellent source of calcium and a good source of protein and riboflavin.

Cost per Serving: $0.35 Pricing Note: all ingredients were at “regular” prices.

Here is the type of Mexican chocolate I used:


Click here to download and print a copy of Frothy Mexican Chocolate recipe.

Be sure to check out these other blogs for more interesting tools and gadgets. get the InLinkz code

Wednesday, November 21, 2012

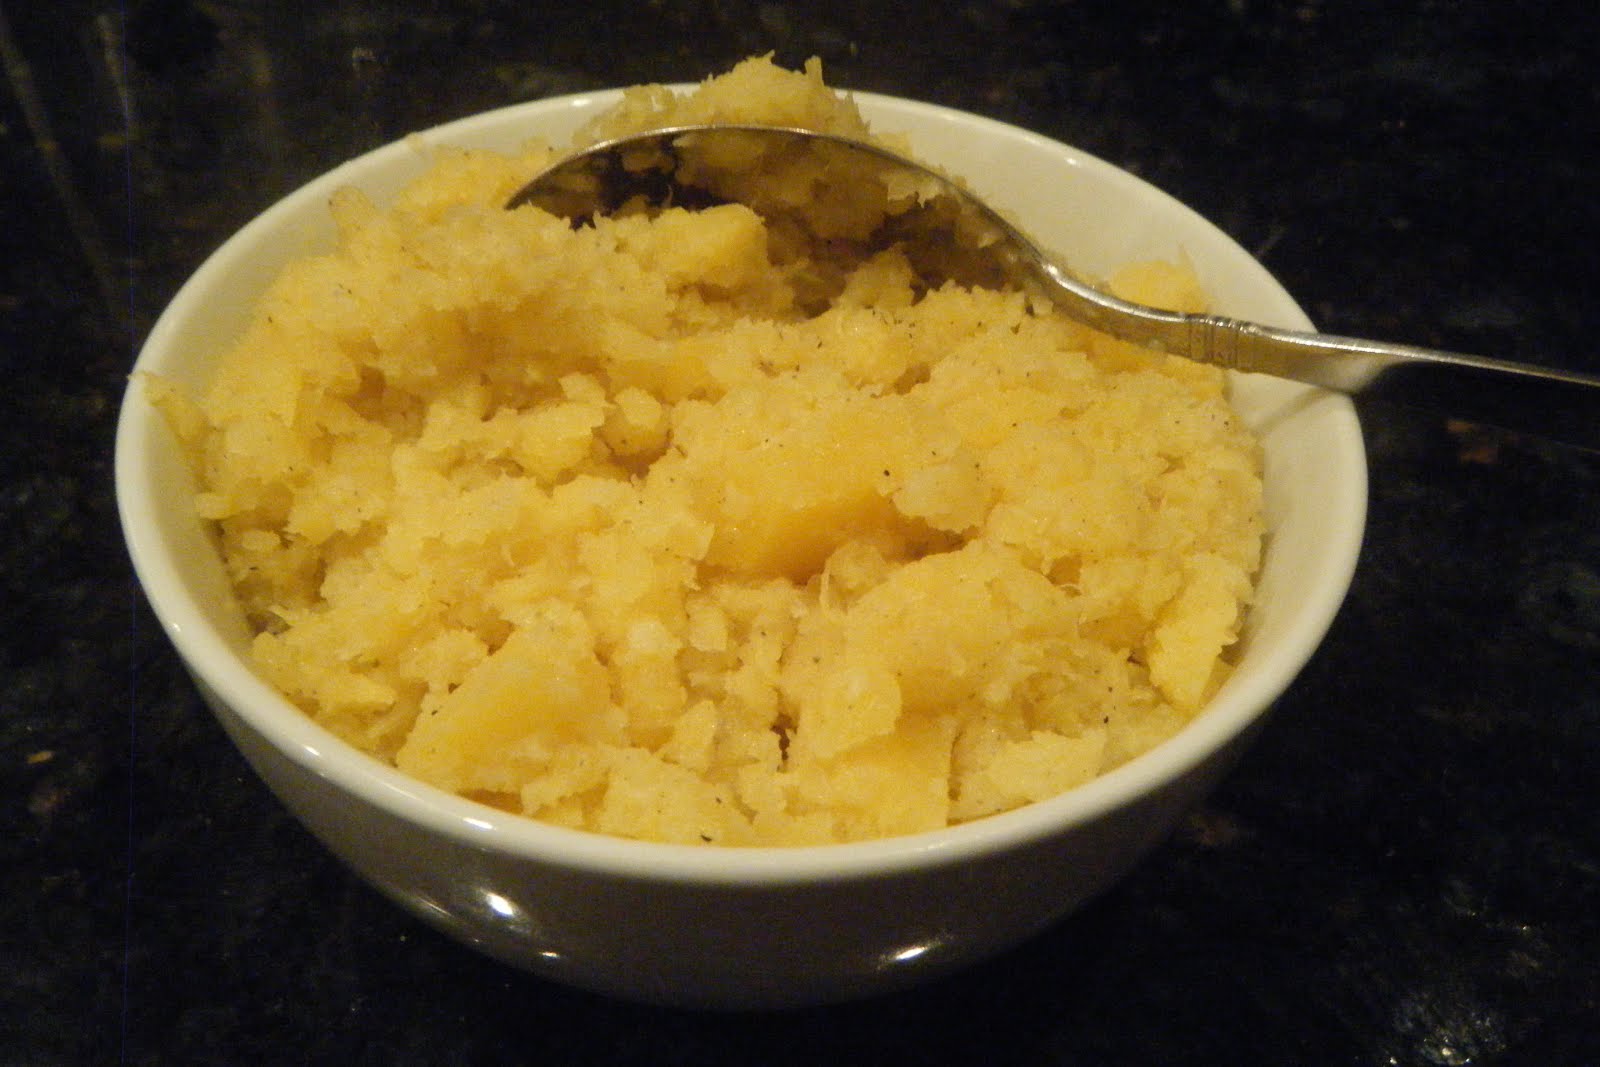
Mashed Rutabagas A Family Favorite

It's not a holiday meal without mashed rutabagas.

The theme for Recipe Redux this month is "vintage side dishes" that have been a part of your family's holiday meals. For m family, mashed rutabagas have been a staple at our Thanksgiving and Christmas tables for as long as I can remember. My mother’s mother started the tradition. I’m not sure how the tradition started in my mother’s family, but I suspect they grew rutabagas in their backyard in the Bronx, New York. For me and my brothers, it isn’t a “traditional” thanksgiving dinner unless mashed rutabagas are part of the meal. As kids, my brothers and I would fight about who had to peel the potatoes and who had to peel the rutabagas. They rutabagas were always harder – they were awkward to handle and it took a lot of effort to cut them into cubes.

Mashed rutabagas in my family are nothing fancy. You simply boil the peeled and cubed whole rutabagas, mashed them once tender, and add some milk, margarine, salt and pepper. Then, most of us pour turkey gravy over them just before eating them. We’ve had various friends and neighbors over to celebrate Thanksgiving with our family over the years and there is always a question about the rutabagas. The rest of the meal is fairly “traditional” with turkey, stuffing, cranberry sauce, a green vegetable (broccoli or green beans), mashed potatoes and gravy. But, the rutabagas just don't seem to be that common in many families.

Rutabagas are nutritious, no surprise here. One cup of cooked rutabagas, before adding margarine or butter or salt, provides only 72 calories, no fat, 4.3 grams of dietary fiber, 518 mg of potassium, and 45 mg of vitamin C.

Click here to download the complete Mashed Rutabagas recipe.

Here are some prep photos:

Mashed rutabaga preparation is easy.

 Be sure to check out these other side dishes from other Recipe Reduxers. get the InLinkz code

Sunday, October 21, 2012

Roasted Winter Vegetable Soup is Packed with Antioxidants

Roasted Winter Vegetable Soup
I love fall/winter soups. There’s nothing more satisfying and delicious to me. Serve a hearty soup with a small green salad and a slice of whole grain bread and you’ve got dinner ready. And if you make a large pot of soup like I do, my family and I can eat it for a few days. It makes putting dinner on the table ultra-easy when all you have to do is reheat soup.

This month’s Recipe Redux theme is to think about orange and other fall colors and offer recipes that are antioxidant-rich, especially in beta-carotene. So, I decided to make a hearty winter soup. But I didn’t just want butternut squash in it. Why not have several winter squashes and throw in a few carrots and a sweet potato?

I find it is much easier to cut a whole winter squash in half, roast it, and then scoop out the cooked insides. Trying to peel raw winter squash and cutting it into cubes can be quite challenging if you ask me. And, if you are going to roast the squash, why not also roast the sweet potatoes, onions, carrots and garlic at the same time. I love the taste of roasted veggies. It adds another flavor dimension to the soup. After these veggies are roasted, they are combined with canned diced tomatoes, chicken broth, and seasonings. You then puree the soup (carefully) in a blender and serve it with small dollops of plain yogurt on top. The orangish-golden color of the soup contrasts nicely with the white yogurt.

Best of all, one serving of this soup costs only about $1.10 a serving and it is packed with nutrition. One serving is only 124 calories, provides 2 grams of fat, , 390% of one’s vitamin A, 49% of vitamin C and 25% of the dietary fiber recommended for a day.

Click here to download and print a copy of the complete recipe, with nutrition analysis and cost per serving information.

How well do you know your winter squashes? Click here to see images and descriptions of 15 different winter squashes by Linda Stradley of What’s Cooking America. Her description includes taste, seasonality, & best ways to prepare the squash. She also has tips on how to purchase, prepare, and store winter squashes.

Be sure to check out colorful, antioxidant-rich recipes from other Recipe Reduxers. get the InLinkz code

Tuesday, August 21, 2012

French Onion Soup in Paris Most Memorable

French Onion Soup

The theme for Recipe Redux this month is to reflect on a most memorable vacation meal. Well, I’ve had several memorable dinners in recent years but the most memorable meal that is freshest in my mind is a delectable, scrumptious French onion soup that I enjoyed with my sister-in-law and friend in Paris just this past May.

I spent a week in Paris with my brother and sister-in-law. My sister-in-law and I spent one day checking out the Palace of Versailles. While there, we met a woman from Arizona traveling by herself in Paris. We buddied up with her all day and she joined us for dinner that evening. I had only two full days left to see Paris and I had yet to eat French onion soup. We ate dinner at a restaurant only a couple of blocks from our hotel near Notre Dame. My onion soup was to die for. The broth was full of flavor, it had lots of onions and the melted cheese and bread on top were broiled to perfection. I was in heaven.


I helped to make a French onion soup only once before when I spent a month in Switzerland for a culinary program where our class had to cook dinner for about 100 students at Shiller University every Monday night, under the direction of their chefs and staff. I learned then that the secret to a fantastic French onion soup is to cook the onions for a long, long time.

After checking a variety of onion soup recipes, I decided to use a method of baking the onion slices in the oven instead of cooking them on a range top. Both methods take a long time, but with the oven method there is less “hands-on” time. I was extremely pleased with my final result. The soup had tons of flavor. The toasted bread soaked up the broth and was delectable, especially with melted gruyere cheese on top.

Here are some prep photos:


Here is the actual recipe.

French Onion Soup

Ingredients:

3 lbs yellow onions, peeled
Non-stick cooking spray
¼ cup canola vegetable oil
½ tsp salt
4 cups low sodium chicken broth
2 cups water
¼ cup dry sherry or dry white wine
2 tsp reduced sodium beef base (such as Better Than Bouillon)
4 springs fresh thyme or 1 Tbsp dried thyme leaves
1 bay leaf
½ tsp ground black pepper, or to taste

1/2 French baguette, cut in 6 (3/4-inch thick) slices
3 oz Gruyere cheese, grated using large-hole grater

Directions:

Preheat oven to 400 degrees.

Cut onions in half and then each half into ¼-inch slices. Spray large Dutch oven with cooking spray. Add onions to pot; then add oil and salt. Stir to blend well. Place pot in oven, covered, for 30 minutes. Carefully remove pot form oven and stir well, scraping sides. Return to oven and continue to cook, covered, for another 30 minutes. Carefully remove pot from oven and stir again. Return pot to oven with lid slightly agar and continue to cook for another 90 minutes, stirring every 30 minutes.

After 2-1/2 hours total oven time, carefully remove pot from oven. Place on range top over medium-high heat and cook, stirring frequently until liquid evaporates and onions turn brown, about 15 to 20 minutes. May need to stir constantly, scraping sides and bottom of pot, towards the end of the cooking time to prevent onions from burning. Stir in chicken broth, water, sherry, beef base, thyme, bay leaf, and pepper. Bring to a boil; then reduce heat to simmer and simmer, covered, for 30 minutes.

Meanwhile, lightly toast baguette slices until just golden brown; set aside.

After soup has simmered for 30 minutes, remove bay leaf and thyme. Divide soup into 6 broiler-safe bowls or crocks. Place bowls on baking sheet. Top each bowl with 1 toasted baguette slice and sprinkle with 1/6th of cheese. Adjust oven rack so top of bowl is about 1 to 2 inches from broiler heating element. Broil just until cheese is melted and golden brown, about 2 to 3 minutes. Let cool slightly before serving.

Makes 6 servings (about 1-1/3 cups each without the cheese bread).

Nutrition Information per Serving: 315 calories,14 g total fat, 3 g saturated fat, 16 mg cholesterol, 4 g dietary fiber, 12 g protein, and 470 mg sodium. One serving of this low cost recipe provides an excellent source of vitamin C and calcium and a good source of folate and vitamin B-6.

Cost per Serving: $1.89 Pricing Note: all ingredients were at “regular” prices.

Click here to download and print this French Onion Soup recipe.

For sake of comparison, I did a nutritional analysis of both my version and Julia Child’s version (found in The Way to Cook) of French onion soup. Julia’s version used butter and olive oil, 5 tablespoons brandy, 1 cup of French vermouth, Swiss cheese and parmesan cheese. Of course, her version had more butter, alcohol and cheese than mine.


French Onion Soup
Julia Child’s
Dr. Barb’s
Calories
427
315
Total fat
15 g
14 g
Cholesterol
34 mg
16 mg
Sodium
1456 mg
470 mg
Dietary Fiber
4 g
4 g
Protein
20 g
12 g

The biggest difference, as you can see, between Julia's and mine is in the total calories and sodium.

Be sure to check out these other vacation memorable meals. get the InLinkz code

Saturday, July 21, 2012

Beat the Heat with Basil Spring Rolls

Basil Spring Rolls with Dipping Sauce

The theme for Recipe Redux this month is “beat the heat with no cook meals.” With much of the country in 90 plus degree heat the last few weeks, it’s a perfect time to think about cool, refreshing meals  and snacks that don't heat up the kitchen.

In January of this year I learned how to make basil spring rolls from my sister-in-law who is originally from Vietnam, now living in Atlanta. My oldest brother who lives in San Diego was hosting a small party and my sister-in-law and her sister decided we would throw together a number of Vietnamese dishes for the party. The basil spring rolls were a big hit att the party.

 I found the rice wrappers and rice noodles at a nearby ethnic food store. You may also find them in your larger supermarkets.

Basil Spring Roll Ingredients


My sister-in-law used a few hard-to-find ingredients, such as kafir leaves. For this month's Recipe Redux post, I decided to modify her recipe and use readily available ingredients. I’m growing both regular basil and purple basil in my vegetable garden, as well as mint and cilantro. You can use any type of basil you like, including thai basil.

Bowl of lettuces, basils, mint, & cilantro


You cook up the rice noodles in boiling water and then drain them. 
Boil rice noodles 3 to 5 minutes, then set aside

You set up an assembly line of ingredients.

Here are photos to show how to assemble the spring rolls.

Basil Spring Roll Assembly


Here is the complete recipe.

Basil Spring Rolls

Ingredients:


2 oz rice noodles

2 cups packed assorted lettuces, washed, spun dry and torn

1 cup fresh basil (green, purple, or Thai or a mixture), washed and chopped fine

2 Tbsp fresh mint leaves, chopped fine

2 Tbsp fresh cilantro leaves, chopped fine

6 large or jumbo shrimp, peeled, deveined, & cooked

6 round rice wrappers (8.5 in in diameter)


6 Tbsp hoisin sauce

1 Tbsp creamy reduced sodium peanut butter

Dash cayenne (red) pepper

1 tsp finely chopped roasted unsalted peanuts


Directions:

Bring a medium stockpot of  water to a low boil; add rice noodles and cook until tender, stirring occasionally, approximately 3 to 5 minutes. Strain, and rinse to prevent sticking. Set aside.


In medium bowl, combine lettuces, basil, mint and cilantro; set aside.


Cut each shrimp in half the length of the shrimp resulting in 12 halves; set aside.


Fill a dinner plate (that has a rim) or a casserole dish with hot water. Dip each rice wrapper in hot water for several seconds until sheet becomes soft and flexible. Lay softened wrapper on a flat surface, and place two shrimp halves, pink side down, in center of wrapper. Top with about ¼ cup of cooked rice noodles and ½ cup of lettuce/basil mixture, leaving about 2 inches uncovered on all sides of the wrapper. Fold bottom uncovered side over fillings. Fold both sides inward and roll wrapper tightly forward without tearing. Repeat this process five more times with remaining ingredients.

To make dipping sauce, place hoisin sauce, peanut butter, and cayenne pepper in microwave-safe dish; stir to combine. Microwave on high power for 30 to 45 seconds, or until warm. Transfer to serving dish; garnish sauce with chopped peanuts.


Makes  6 servings (one spring roll each).


Nutrition Information per Serving (one roll):

121 calories, 2 g total fat, 0 g saturated fat, 18 mg cholesterol, 1 g dietary fiber, 4 g protein, and 375 mg sodium. One serving of this low cost recipe provides an excellent source of vitamins A and K.

Cost per Serving: $0.61

Pricing Note: all ingredients were at “regular” prices except shrimp on sale for $5.99 per pound and peanut butter. Basil and mint were from home garden.


Click here to download and print a copy of the Basil Spring Roll recipe.
Be sure to check out these other no-cook favorite recipes. get the InLinkz code