Helping families eat healthier for less

Helping families eat healthier for less
Showing posts with label Recipe Redux. Show all posts

Tuesday, December 22, 2015

Homemade Green Onion Crackers are sure to impress


Homemade Green Onion Crackers are sure to impress


The Recipe ReDux has been around for 54 months! To celebrate, we’re playing a little party game this month: Grab your nearest cookbook and ReDux the recipe on page 54 or 154.

I chose Mollie Katzen’s Vegetable Heaven cookbook that I haven’t used in ages, although it has many good recipes in it. I turned to page 54 and found a recipe for Green Onion Wonton Strips. 

Mollie Katzen's Vegetable Heaven cookbook

This recipe is for making homemade crackers, not really won tons. The original recipe had only white flour, scallions, salt, water, vegetable oil and Chinese sesame oil. I wanted to make them with more fiber so I substituted high fiber flour from Bob’s Red Mill and I added sesame seeds, poppy seeds, and dill. I also found that instead of oil in a skillet, they worked just fine using non-stick spray. I also suggest cutting the green onion pancakes into squares as well as strips.

You will impress your family and guests this holiday when you bring out these homemade crackers. They’re perfect served with cheeses, especially goat cheese, one of my favorites. Your guests will know they’re homemade as they don’t have perfect edges.


Green Onion Crackers

Ingredients:
1-1/3 cups high fiber wheat flour (I used Bob’s Red Mill)
3 medium scallions, finely minced (about 1/3 cup)
1/2 teaspoon salt
1 tablespoon sesame seeds
1 teaspoon poppy seeds
1 teaspoon dill weed
1/2 cup water
Extra flour for handling dough
Non-stick cooking spray
1 tablespoon Chinese sesame oil

Directions:
In a medium bowl, combine flour, scallions, salt, sesame seeds, poppy seeds, and dill. Add the water and stir until well combined and ball is formed. Transfer dough to floured surface and knead a few times, adding additional flour if needed to keep from sticking. Divide the dough into 6 equal balls. Roll each ball on floured surface with floured rolling pin until thin, about 7 inches in diameter. Stack the pancakes on a plate, using flour between them to keep them separate. Heat a heavy skillet sprayed with non-stick spray over medium heat. Add pancakes one at a time and cook for 4 to 5 minutes per side. Brush the top side of each pancake with sesame oil. Cut each pancake in half and then each half into thin strips or squares. Sprinkle with additional salt, if desired. Let cool at least 10 minutes. Store in airtight container at room temperature for up to a week.
Makes 6 to 8 servings (about 90 bite-sized crackers).

Nutrition Information per 1/8th Serving:
92 calories, 3 g total fat, 0 g saturated fat, 0 mg cholesterol, 2 g dietary fiber, 3 g protein, and 149 mg sodium.


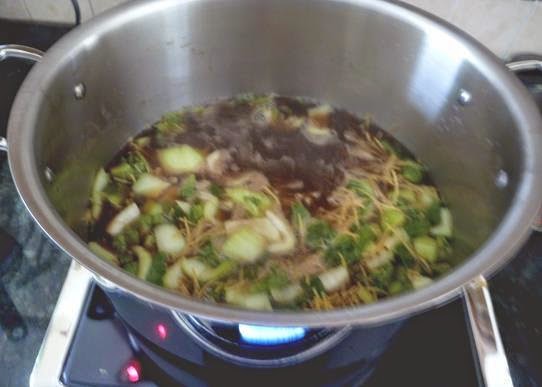
Preparation Steps for Green Onion Crackers


Tuesday, September 22, 2015

Enjoy Fresh Peaches All Year 'Round with Peach Sorbet

Peach Sorbet Anytime of Year

Summer is over. Fall is here. In Delaware, homegrown peaches have been available all summer. Many are grown in my state while others are coming from the South. While the theme this month is on freezer meals, I'm going to focus on freezer desserts -- peach sorbet made from fresh peaches.

The recipe is very simple: fresh peaches, water and maple syrup or honey. That's it.

Here is the recipe:

Fresh Peach Sorbet
4 cups fresh peach cubes (1/2-inch cubes)
2 Tbsp water, divided
2 Tbsp maple syrup or honey, divided

Place peach cubes on wax paper-lined baking sheet and place in freezer for at least 2 hours, or until frozen solid.

Frozen peach cubes

Place 2 cups of frozen cubes, 1 tablespoon water and 1 tablespoon maple syrup in food processor. Pulse on and off repeatedly until peaches are completely mixed. Scrape sides with spatula periodically.

Peaches in food processor

Scoop into serving dishes or transfer to plastic container with lid. Repeat process with remaining peaches, water and syrup. Serve immediately or freeze up to 2 weeks.

Processed peaches in plastic container

Makes 8 servings (1/2 cup each)

Nutrition Information per 1/2-cup serving (with maple syrup):
28 calories, 0 g total fat, 0 g saturated fat, 0 mg cholesterol, 0.6 g dietary fiber, 0.4 g protein, 7 g carbohydrate, and 0 mg sodium.


Saturday, August 22, 2015

Back to the Dinner Table with Roasted Pork and Veggies


Slow-cooked pork with vegetables is a family favorite

Recipe Redux’s theme for August is “Back to the Dinner Table.”  It could be a family favorite that has be “ReDuxed” or a current family favorite. For me it is pork roast with a lot of veggies. I didn't eat red meat when I was younger. But, then I moved to the Midwest (Nebraska) and had the best pork I've ever eaten in my life. It converted me. While I don't eat pork roasts often, I love them and this one is a family favorite.

This recipe uses the slow cooker. One pot. Once things are assembled, you can basically forget about it for several hours. The pork is cooked with carrots, parsnips, potatoes, and sweet potatoes in a tomato-based broth. My family loves it.  It's sure to please your's too.

Slow Cooked Roast Pork with Veggies


Ingredients:

Non-stick cooking spray
1 2-pound boneless sirloin tip pork roast
2 teaspoons canola oil
1 large sweet onion, peeled and chopped
5 cloves garlic, peeled and minced
1 (14.5 oz) can no salt added diced tomatoes
3/4 cup no salt added vegetable broth
½ teaspoon ground black pepper
1 pound carrots, peeled and cut into 2-inch strips
1 large or 2 small parsnips, peeled and cut into 2-inch strips
12 ounces baby red potatoes, cut in half or quarters (depending on size)
1 pound sweet potatoes, peeled and cut into 1-inch cubes


Directions:

Spray a large dutch oven with non-stick spray and heat on high heat. When pan is hot, add roast that has been patted dry with paper towels to pan and brown on all sides. Remove browned roast and set in bowl of slow cooker set on high. Return dutch oven to range top and heat oil over medium-high heat. Add onions and cook until soft, about 5 minutes, stirring frequently. Add garlic, tomatoes, broth, pepper, carrots, parsnips, potatoes, and sweet potatoes. Coat all vegetables well with sauce. Pour mixture into slow cooker on top of the pork roast. Cook for 4 to 6 hours on high (or 6 to 8 hours on low), until pork and vegetables are fully cooked.

Makes 8 servings.

Nutritional Information (1 serving = 3 ounces cooked pork plus 1/8 vegetable mixture):
276 calories, 3.4 g total fat, 0.8 g saturated fat, 5.7 g dietary fiber, 29.0 g protein, 167 mg sodium. One serving provides an excellent source of vitamins A and C, potassium, and fiber.

Cost per Serving: $1.83
Pricing Note: all ingredients were at “regular” prices.


Wednesday, April 22, 2015

Red Lentil Soup uses red lentils and canned tomatoes and chicken broth.


The theme for April for Recipe Redux is to go through our pantry, freezer or refrigerator and see what treasures we find.  In going through my pantry, I found some red lentils, canned tomatoes, and low sodium chicken broth .


 I love red lentils. They cook faster than the French green or brown lentils. All lentils are loaded with nutrition, particularly protein, fiber, folate, thiamin, phosphorus and iron.


If you haven’t done a lot of bean cooking from “scratch,” this is an easy recipe to make. There is no pre-soaking of the beans and it all cooks up in about 30 minutes. It also uses one of my favorite spices, smoked paprika.


Red Lentil Soup

1 large sweet onion, peeled and diced
2 medium carrots, peeled and cut into coins
3 stalks celery with leaves, diced
3 cloves garlic, peeled and minced
1 tablespoon olive oil
32 ounces (4 cups) low sodium chicken broth
1 14.5-oz can diced tomatoes
1 cup dry red lentils (green or brown lentils may be substituted)
1 tsp. curry powder
1 tsp. black pepper
½ tsp smoked paprika

Sauté onion, celery, carrots, and garlic in oil over medium-high in large dutch oven until onion is tender, about 5 minutes. Add broth, tomatoes, lentils, and seasonings. Bring soup to a boil, then reduce heat to low and simmer for 30 minutes.

Makes 4 large servings (about 1-1/2 cups each).

Nutrition Information per Serving:
297 calories, 6.2 g total fat, 1.1 g saturated fat, 0 mg cholesterol, 9.1 g dietary fiber, 19.0 g protein, and 167 mg sodium. One serving of this recipe is an excellent source of fiber and protein.

Cost per Serving : $1.82
Pricing Note: all ingredients were at “regular” prices. Look for red lentils in ethnic supermarkets.


Saturday, March 7, 2015

Bite into NNM with Sweet Potato Breakfast Risotto with Cinnamon and Raisins


Sweet Potato Breakfast Risotto with Cinnamon and Raisins

By posting this recipe I am entering a recipe contest sponsored by USA Rice Federation and am eligible to win prizes associated with the contest. I was not compensated for my time.


The theme for this March’s National Nutrition Month® is “Bite Into a Healthy Lifestyle.” You can do this now by biting into a morning bowl of creamy risotto rice, flavored with sweet potatoes, cinnamon and raisins. there are so many reasons to "think rice" when biting into a healthy lifestyle. Visit the USA Rice website (www.usarice.com) for a wealth of information about rice grown in this country. For example, I learned:

·         Rice is naturally gluten free and the least allergenic of all grains.
·         Rice is naturally sodium-, cholesterol-, trans fat-free with just a trace of fat.
·         A half cup serving of rice is about 100 calories and contributes 15 vitamins and minerals, especially folate, other B vitamins, iron and zinc, making it a nutrient dense choice.
·         Rice supplies complex carbohydrates that our bodies and brains need to function. It triggers the production of serotonin in our brains, a chemical that helps regulate and improve our mood.
·         Rice grown in the US has a positive impact on our environment as the rice fields create wetland habitats for many species of birds, mammals, and reptiles.
·         About 85% of the rice eaten in this country is grown in this country.
·         American grown rice is exported to over 150 countries.

Arborio or risotto rice is different from long grain, white rice.  It’s higher in starch and cooks into a creamy texture around a chewy center. This rice has an exceptional ability to absorb flavors.  The cooking method is different too!  Instead of simmering rice in water, small amounts of hot liquid get added to cooking rice.  The rice slowly absorbs the liquid as one stirs.

For me, rice and coconut are a winning combination. So, when thinking about developing a breakfast risotto, I decided to start with canned lite coconut milk as the base. Then I wanted to add some good nutrition with some mashed cooked sweet potato. To round out the flavors, I added cinnamon, vanilla extract and golden raisins.


Sweet Potato Breakfast Risotto with Cinnamon and Raisins

Ingredients:
2 cans (13.6- to 14 ounces each) light coconut milk
2 tablespoons unsalted butter or margarine
1 cup U.S.-grown arborio (medium grain) rice
1/2 cup cooked sweet potato, mashed
1/4 cup packed brown sugar
1 tablespoon vanilla extract
1 teaspoon ground cinnamon
1/4 cup golden raisins


Directions:
Warm coconut milk in microwave-safe container, covered, until hot, but not boiling, about 4 minutes. Melt butter in a large saucepan over medium heat. Add the rice and stir to coat. Ladle in enough hot coconut milk to cover the rice. Stir with wooden spoon over medium flame. As rice absorbs the milk, ladle in 1/2 cup more hot milk and stir. Continue this process until all the milk has been added and is absorbed, stirring constantly. This will take 15 to 20 minutes. Rice should be tender with just a little bite to it. Stir in the sweet potato, brown sugar, vanilla, cinnamon and raisins. Stir well to combine. Stir over low heat until heated through.
Serve warm or cold.

Makes 4 to 6 servings

Nutrition Information per Serving (for 1/6th of recipe):
322 calories, 13 g total fat, 9 g saturated fat, 10 mg cholesterol, 2 g dietary fiber, 3 g protein, and 38 mg sodium. One serving of this low cost recipe provides an excellent source of vitamin A.

Cost per Serving: $1.39
Pricing Note: all ingredients were at “regular” prices.


 Here are preparation photos:

(Left to Right): Adding rice to pan with butter; stirring to coat; adding hot coconut milk in stages.


(Left to Right); Addition of milk and stirring; rice develops a creamy texture; addition of mashed sweet potato,cinnamon, vanilla, and golden raisins.


Sunday, February 22, 2015

dark chocolate + black beans = guilt-free brownies

Guilt-Free Black Bean Brownies


The theme for February for Recipe Redux is to identify your favorite chocolate match.  Valentine’s Day is over and many of us may have “extra” chocolate laying around.  So, we need to show our favorite healthy chocolate combo.


For me, I love dark chocolate brownies. But there can be a guilt factor with the “normal” or “traditional” brownies. So, I make mine using canned black beans in place of the vegetable oil typically called for in the recipe. It saves on calories and total fat and adds fiber. And, it means less guilt while enjoying them.


E-Z Bean Brownies

1 15 oz. can cooked beans, drained and rinsed well (can use black beans or dark red kidney
                beans)
2 large eggs
¼ cup water
1 19-1/2 oz. package chocolate fudge brownie mix
1/4 cup bittersweet 60% cocoa chocolate chips

Preheat the oven to 350°F. Line a 9 X 9-inch baking pan with foil; then spray with nonstick cooking spray and set aside. Place the drained beans in the bowl of a food processor; process until smooth and creamy.  In a large bowl combine the pureed beans, eggs, water, and brownie mix; stir just until smooth, about 50 strokes.  Pour the batter into the prepared baking dish and bake 30 to 35 minutes, or until the edges start to pull away from the sides and a toothpick inserted in the center comes out clean. Top cooked brownies with chocolate chips as soon as remove from oven. Spread in even layer with spatula. Let cool completely. Lift out of pan and cut into squares.
Makes 20 Servings
Nutrition Information per Serving (1/20 of recipe):
150 calories, 3.8 g total fat, 0.6 g saturated fat, 0 mg cholesterol, 1.6 g dietary fiber, 3.0 g protein, and 134 mg sodium.
Cost per Serving (1/20 recipe): $0.18

Pricing Note: all ingredients were at “regular” prices except for the brownie mix (on sale for $1.50 a box).

Thursday, January 22, 2015

Recipe Redux - Spicy Bok Choy Soup

Spicy Bok Choy Soup is fast and easy.

This month for Recipe Redux we were given the challenge to show a healthy dish we are heating up with smoke and/or spiciness. I choose spiciness. It is perfect for lunch or dinner on a cold, winter day

This is an fast and easy soup that goes to together in no time. You can add as mush or as little sriracha sauce as you like.


Spicy Bok Choy Soup


Ingredients
3 cups bok choy
6 cups chicken broth                
1/4 cup reduced sodium soy sauce
1 tablespoon Chinese rice wine or sherry  
1 tablespoon fresh minced ginger
3 cloves minced garlic
3 green onions, trimmed and cut into 1-inch pieces (use both white and green parts)
1/2 teaspoon black pepper
1/2 teaspoon sriracha sauce, or to taste
2 teaspoons dark sesame oil
6 to 8 ounces dry Chinese egg noodles or soba noodles


Directions:
Cut off the stem end of bok choy; separate leaves. Wash and dry. Cut into 1-inch pieces.

Combine the chicken broth, soy sauce, rice wine, ginger, garlic, and green onions in a large pot.  Season with pepper and sriracha sauce; stir the ingredients until well mixed.  Heat over medium-high heat. Once the mixture has reached a boil, add bok choy , sesame oil, and noodles. Reduce heat to medium; cook for 3 minutes or until the noodles are tender. Ladle soup into bowls.

Makes 6 servings


Nutrition Information per Serving:
148 calories, 2 g total fat, 1 g saturated fat, 3 mg cholesterol, 1 g dietary fiber, 7 g protein, and 541 mg sodium. One serving of this low cost recipe provides an excellent source of vitamin A and C.


Cost per Serving: $1.25

Pricing Note: all ingredients were at “regular” prices.


Preparation photos:


Monday, September 22, 2014

Dehydrated Mushrooms Easy To Do


Dried Mushrooms Are Easy To Do


The Recipe Redux theme this month is to think dehydrated favorites using a food dehydrator, a low, slow oven, or natural sunshine to preserve natural healthfulness. I decided to try dehydrating mushrooms. I have purchased dried mushrooms in a package before, like porcini and wood ear, but had never dried drying my own before this month’s challenge.

I started with a bunch of white button mushrooms. Of course, you can use any type of mushroom.
You start by cleaning them. I used a dry paper towel and rubbed them gently to remove any visible dirt. Several sources suggest that one not use water to clean them as this adds too much moisture to the mushrooms and they will take longer to dry.


I then used a slicer to cut the mushrooms into uniform slices. This slicer can be used for cooked eggs and strawberries, as well as mushrooms. It creates uniform slices. You can also use a sharp knife or a mandolin.


Place the sliced mushrooms in a single layer on a dry baking sheet. Do not spray with cooking spray or coat with oil. I also decided to experiment and seasoned half of the slice mushrooms with dried thyme. You can use any of your favorite spices. Curry, lemon pepper, or basil are other ideas.


Bake in a 150 to 170 degree oven for one hour. The lowest temperature my oven goes is 170 degrees. Several sources I read said 150 degrees. After one hour, turn the slices over. Place back in oven and cook for another hour.  Check the mushrooms. They should be dry and brittle and crack when you bend them. If not this dry, put back in oven and cook for another hour.
Let the dry, cooked mushrooms cool completely on a rack.
Once dry, place in a jar with a tight fitting lid. Store in a dark, cool place.


Dried mushrooms can be rehydrated in boiling water or soup. Use them in pasta dishes, stews, soups, omelets, or a variety of dishes.

Tuesday, July 22, 2014

Peach Cake with Peach Schnapps is a Great Way to Use Summer Peaches


Peach Cake Uses Summer Peaches and Peach Schnapps


The theme for Recipe Redux for July is to show others how you like to cook, bake, or mix-it-up with spirits, extracts or other alcohols. What’s your healthy recipe with spirit? What immediately came to my mind was a great tasting and great looking peach cake I made several years back that uses peach schnapps to intensify the peach flavor of the cake.

I found this Summer Peach Cake recipe in the July/August 2011 issue of my favorite magazine, Cook’s Illustrated. I love this magazine because they do an outstanding job of creating wonderful recipes and testing them umpteen times to get just the right cooking method and the perfect amount or proportion of ingredients. You also refresh your memory or learn many food science concepts.

The peach cake uses 2 and a half pounds of fresh peaches in one 9-inch round cake. Prior to mixing the peaches in the cake, you bake the slices in the oven to help intensify their flavor and caramelize their juices in order to prevent a runny cake. Yvonne Ruperti, the person who created this recipe for Cook’s Illustrated, tried lots of ways to enhance the peach flavor, from using dried peaches to peach-flavored yogurt. The peach schnapps was the winner. I was extremely pleased with the final product. It looked fabulous, like I had spent a lot of time (which I didn’t). It tasted great and had great peach flavor.

By getting the peaches on sale, I was able to make this cake for $6.27 total, or $0.63 a serving for 10 servings. A great buy for an impressive-looking summer dessert.


Here is the recipe from Cook’s Illustrated:

Summer Peach Cake

From Cook’s Illustrated, July & August 2011, page 24-25.

Serves 8 to 10


2-1/2 pounds peaches, pitted and cut into 1/2-inch-thick wedges

5 tablespoons peach schnapps

4 teaspoons lemon juice

6 tablespoons plus 1/3 cup granulated sugar

1 cup (5 ounces) all-purpose flour

1-1/4 teaspoons baking powder

3/4 teaspoon salt

1/2 cup packed (3-1/2 ounces) light brown sugar

2 large eggs

8 tablespoons unsalted butter, melted and cooled

1/4 cup sour cream

1-1/2 tablespoons vanilla extract

1/4 teaspoon plus 1/8 teaspoon almond extract

1/3 cup panko bread crumbs, crushed fine


  1.  Adjust oven rack to middle position and heat oven to 425 degrees. Line rimmed baking sheet with aluminum foil and spray with vegetable oil spray. Gently toss 24 peach wedges with 2 tablespoons schnapps, 2 teaspoons lemon juice, and 1 tablespoon granulated sugar in bowl; set aside.
  2. Cut remaining peach wedges crosswise into thirds. Gently toss chucks with remaining 3 tablespoons schnapps, remaining 2 teaspoons lemon juice, and 2 tablespoons granulated sugar in bowl. Spread peach chunks in single layer on prepared sheet and bake until exuded juices begin to thicken and caramelize at edges of sheet, 20 to 25 minutes. Transfer sheet to wire rack and let peaches cool to room temperature, about 30 minutes. Reduce oven temperature to 350 degrees.
  3. Spray 9-inch springform pan with vegetable oil spray. Whisk flour, baking powder, and salt together in bowl. Whisk brown sugar, 1/3 cup granulated sugar, and eggs together in second bowl until thick and homogeneous, about 45 seconds. Slowly whisk in butter until combined. Add sour cream, vanilla, and 1/4 teaspoon almond extract; whisk until combined. Add flour mixture and whisk until just combined.
  4. Transfer half of batter to prepared pan; using offset spatula, spread batter evenly to pan edges and smooth surface. Sprinkle crushed bread crumbs evenly over cooled peach chunks and gently toss to coat. Arrange peach chunks on batter in even layer, gently pressing peaches into batter. Gently spread remaining batter over peach chunks and smooth top. Arrange reserved peach wedges, slightly overlapped, in ring over surface of cake, placing smaller wedges in center. Stir together remaining 3 tablespoons granulated sugar and remaining 1/8 teaspoons almond extract in small bowl until sugar is moistened. Sprinkle sugar mixture evenly over top of cake.
  5. Bake until center of cake is set and toothpick inserted in center comes out clean, 50 to 60 minutes. Transfer pan to wire rack cool 5 minutes. Run paring knife around sides of cake to loosen. Remove cake from pan and let cool completely, 2 to 3 hours. Cut into wedges and serve.


Peach Cake Preparation
Be sure to check out these other spirit-inspired recipes.


Thursday, May 22, 2014

Citrus Tea Infused Millet Cheese Tarts

Tea-Infused Millet Cheese Tarts

I’m a HUGE tea drinker. Have been for decades. It’s my preferred breakfast beverage and during the winter I drink it all day long.  I like green, black, white, herbal, all flavors. I haven’t, however, used tea in cooking applications except one time many years ago when I made brownies that used blackberry tea. They were amazing. So I was very excited when I found out that the theme for this month’s Recipe Redux is cooking with tea. Our task is to create a healthy recipe that is inspired by tea.


I decided to use one of my favorite teas, Good Earth Citrus Kiss. I made millet the usual way, except that I used a strong citrus-flavored tea in place of water or broth. It came out delicious. These cheese cups are easy to do and are great for summer party appetizers. Don’t have millet on hand? Just substitute brown rice or quinoa.

Here’s the recipe:

Tea-Infused Millet Cheese Cups

Ingredients:
Filling:
1 cup dry millet (uncooked)
2 cups strong tea made from 3 citrus or lemon flavored tea bags
1 lean Italian turkey sausage link (about 3.4 ounces), uncooked and casing removed
1/2 medium fennel bulb, chopped (about 1 cup)
1/2 cup chopped sweet onion

Cheese Tarts:
Non-stick cooking spray
8 ounces 50% or 75% reduced fat sharp cheddar cheese

Equipment Needed:
baking sheets
parchment paper
mini muffin pan


Make Filling:
Toast dry millet in a non-stick 10-inch frying pan over medium-high heat, stirring constantly, until millet just begins to turn brown, about 3 to 5 minutes. Add  2 cups of strong tea to toasted millet, reduce heat to medium and cover. Gradually reduce heat to simmer and let cook covered for about 20 minutes. One cup of dry millet yields about 4 cups of cooked millet. Only 1 cup of cooked millet is needed for this recipe. The rest can be used for another recipe or use.

Brown Italian sausage in large, 10-inch non-stick frying skillet over medium-high heat until completely browned on all sides, breaking it apart as it cooks. Reduce heat to medium. Add fennel and onion. Cook, stirring occasionally, for about 4 minutes, or until vegetables are crisp tender. Stir in cooked millet. Cook over medium heat for 3 more minutes, stirring occasionally.  Remove from heat. Set aside.

Make Cheese Tarts: Preheat oven to 400 degrees. Line baking sheets with parchment paper. Spray with non-stick spray. The cheese cups will likely need to be baked in batches. The parchment paper can be reused until all the cheese cups have been baked.  With large holes on a box grater, shred cheese. Place cheese in 1 tablespoon piles on parchment paper lined baking sheet, leaving about inch between piles to allow for spreading. Flatten piles slightly with back of spoon. Bake 8 to 10 minutes on middle rack of oven until bubbly and slightly brown around edges. Don't over bake to prevent toughness. Remove baking sheet  from oven and let set for 1 minute. Then carefully lift each cheese circle and press in bottom of mini muffin pan. Let cool about 5 minutes before removing from muffin pan. Note: cheese cups can be made up to several days in advance, if desired. Keep at room temperature in airtight plastic container lined with paper towels to absorb moisture.

Assembly:
Using a tablespoon, scoop a heaping tablespoon of filling into each cheese tart. Garnish with feathery fennel fronds, if desired. Serve.

Makes 16 appetizers or 8 servings (2 appetizers each).

Nutrition Information per Serving using 75% reduced fat Cheddar cheese):  (Note: one serving is two cheese cups.)
111 calories, 3.8 g total fat, 1.8 g saturated fat, 16.3 mg cholesterol, 0.8 g dietary fiber, 11.8 g protein, and 281 mg sodium.
Nutrition Information per Serving using 50% reduced fat Cheddar cheese):  (Note: one serving is two cheese cups.)
121 calories, 5.8 g total fat, 3.3 g saturated fat, 21.3 mg cholesterol, 0.8 g dietary fiber, 10.8 g protein, and 251 mg sodium.

Cost per Serving (2 Cheese Cups per Serving): $0.88
Pricing Note: all ingredients were at “regular” prices.

Millet browning in pan before tea is added

 Be sure to check out these other tea-inspired creations.

Saturday, February 1, 2014

Pistachio Pairings Just in Time for Valentines Day

salted pistachios + chocolate cheesecake + fresh raspberries + ruby port


I received free pistachio samples from the Pistachio Health Institute mentioned in this post. By posting this pairing, I am entering a contest sponsored by Pistachio Health Institute and am eligible to win prizes associated with the contest. I was not compensated for my time.

 Pistachios were one of my favorite nuts as a young girl. I loved them. My mother purchased them sporadically, so it was a real treat when she did. So, when I learned about this Pistachio Pairing contest with Recipe Redux, I got excited.  I decided to enter the “indulgent” category. Valentines’ Day is right around the corner, so I thought I would come up with a romantic pairing for my husband and I.

Cheesecake Factory chocolate cheesecake + pistachios + fresh raspberries + ruby port

Chocolate cheesecake with fresh raspberries is nothing new. But pair it with a good Ruby port and pistachios in the shell … and you have a real tasty and decadent treat. Ruby port is wonderful when paired with chocolate desserts. It’s sweet red wine with powerful fruit like plum, cherry and berries.  It goes very well with the creamy texture of the chocolate cheesecake. The pistachios add a nice texture, saltiness, and contrast to the cheesecake and port. I was able to buy Cheesecake Factory chocolate cheesecake at my local Costco store. It comes frozen and includes 6 original and 6 chocolate cheesecake portions. It's great to have in the freezer for dessert "emergencies" or special events.

I encourage you to visit the Pistachio Health Institute for a wealth of information and resources for consumers and health professionals. This includes information about pistachios and heart health, weight management and other research studies.  I was amazed to learn that one ounce of pistachios (without the shell) amounts to 49 nuts! That’s a lot of nuts and more nuts per one-ounce serving than any other nut.
49 pistachio shells


Leaving your empty pistachio shells  on your plate or napkin (compared to immediately throwing the shells into a trash can) can actually help you not overeat. They serve as a visual cue and you are likely to consume less.