Helping families eat healthier for less

Helping families eat healthier for less

Friday, December 21, 2012

Frothy Mexican Hot Chocolate Uses Froth-Making Gadget


Close up of plain skim milk that has been frothed

Frothy Mexican Hot Chocolate

Caffé Frother by Bonjour

The theme for this month’s Recipe Redux is to talk about a favorite kitchen tool. Perhaps this will aid any last minute shoppers who still need to get a gift or two for someone.


My latest favorite gadget is a Caffé Frother by Bonjour. There may be other manufacturers. This tool is so cool. It makes fabulous froth in about a minute. It's almost like magic how it instantly turns skim milk into a thick froth. You can use it to make your favorite coffee/expresso-based drinks, including cappucino, café au lait, Irish coffee, and more. You can also use the frother to make a nonfat topping for desserts. You probably want to add some sweetness to the milk, such as a sugar substitute or a little honey or agave syrup if used as a dessert topping. This frother retails for about $25.

 
Plain skim milk in frother

You fill the special container with about a third of skim milk. Then push up and down on the plunger which adds air to the mixture, trippling the original volume. The frother works with fat free milk which makes it a fun way to enjoy this healthy beverage choice. The milk can be cold out of the refrigerator or heated on a stove top or in the microwave. You can add flavorings to the milk, if desired, such as vanilla extract, brandy, rum, or other liqueurs. The frother would also be great for eggnog this time of year.

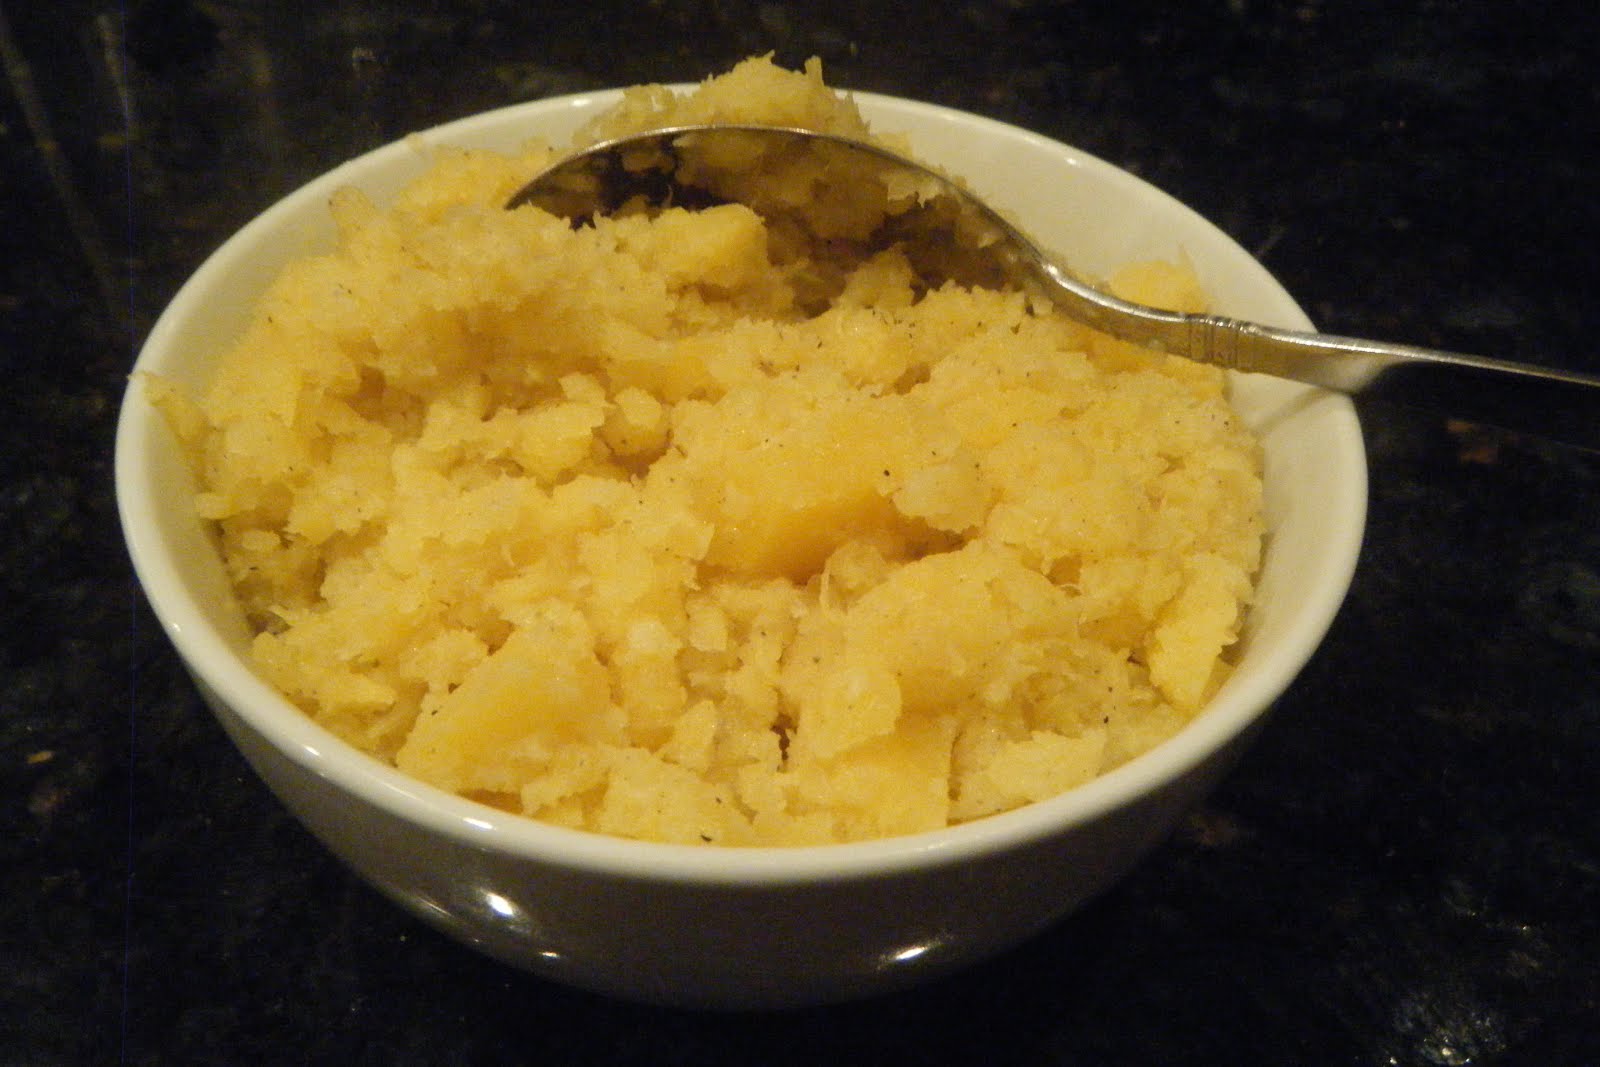
My favorite way to use the frother, though, is to make Frothy Mexican Hot Chocolate. Here is the complete recipe.

Frothy Mexican Hot Chocolate
This recipe can be prepared in less than 5 minutes. It’s perfect on a cold morning or evening. One serving is only 142 calories, yet provides an excellent source of calcium and costs only $0.35.

Ingredients:
0.7 to 1.0 ounce Mexican chocolate (tablet, wedge, or powder)
2/3 cup of fat free milk
¼ tsp cinnamon

Directions:
If Mexican chocolate is a tablet or wedge, crush it to make a powder. Combine all ingredients in a microwave-safe bowl. Heat on high power for 1-1/2 minutes, stirring every 30 seconds. (Do not let milk come to a boil.) Transfer mixture to frother and follow frother instructions. Pour into mug. Makes 1 serving. Note: To make more servings, simply multiply ingredients by the number of desired servings.

Nutrition Information per Serving:
142 calories, 3 g total fat, 2 g saturated fat, 3 mg cholesterol, 1 g dietary fiber, 6 g protein, and 69 mg sodium. One serving of this low cost recipe provides an excellent source of calcium and a good source of protein and riboflavin.

Cost per Serving: $0.35 Pricing Note: all ingredients were at “regular” prices.

Here is the type of Mexican chocolate I used:


Click here to download and print a copy of Frothy Mexican Chocolate recipe.

Be sure to check out these other blogs for more interesting tools and gadgets. get the InLinkz code

Wednesday, November 21, 2012

Mashed Rutabagas A Family Favorite

It's not a holiday meal without mashed rutabagas.

The theme for Recipe Redux this month is "vintage side dishes" that have been a part of your family's holiday meals. For m family, mashed rutabagas have been a staple at our Thanksgiving and Christmas tables for as long as I can remember. My mother’s mother started the tradition. I’m not sure how the tradition started in my mother’s family, but I suspect they grew rutabagas in their backyard in the Bronx, New York. For me and my brothers, it isn’t a “traditional” thanksgiving dinner unless mashed rutabagas are part of the meal. As kids, my brothers and I would fight about who had to peel the potatoes and who had to peel the rutabagas. They rutabagas were always harder – they were awkward to handle and it took a lot of effort to cut them into cubes.

Mashed rutabagas in my family are nothing fancy. You simply boil the peeled and cubed whole rutabagas, mashed them once tender, and add some milk, margarine, salt and pepper. Then, most of us pour turkey gravy over them just before eating them. We’ve had various friends and neighbors over to celebrate Thanksgiving with our family over the years and there is always a question about the rutabagas. The rest of the meal is fairly “traditional” with turkey, stuffing, cranberry sauce, a green vegetable (broccoli or green beans), mashed potatoes and gravy. But, the rutabagas just don't seem to be that common in many families.

Rutabagas are nutritious, no surprise here. One cup of cooked rutabagas, before adding margarine or butter or salt, provides only 72 calories, no fat, 4.3 grams of dietary fiber, 518 mg of potassium, and 45 mg of vitamin C.

Click here to download the complete Mashed Rutabagas recipe.

Here are some prep photos:

Mashed rutabaga preparation is easy.

 Be sure to check out these other side dishes from other Recipe Reduxers. get the InLinkz code

Sunday, October 21, 2012

Roasted Winter Vegetable Soup is Packed with Antioxidants

Roasted Winter Vegetable Soup
I love fall/winter soups. There’s nothing more satisfying and delicious to me. Serve a hearty soup with a small green salad and a slice of whole grain bread and you’ve got dinner ready. And if you make a large pot of soup like I do, my family and I can eat it for a few days. It makes putting dinner on the table ultra-easy when all you have to do is reheat soup.

This month’s Recipe Redux theme is to think about orange and other fall colors and offer recipes that are antioxidant-rich, especially in beta-carotene. So, I decided to make a hearty winter soup. But I didn’t just want butternut squash in it. Why not have several winter squashes and throw in a few carrots and a sweet potato?

I find it is much easier to cut a whole winter squash in half, roast it, and then scoop out the cooked insides. Trying to peel raw winter squash and cutting it into cubes can be quite challenging if you ask me. And, if you are going to roast the squash, why not also roast the sweet potatoes, onions, carrots and garlic at the same time. I love the taste of roasted veggies. It adds another flavor dimension to the soup. After these veggies are roasted, they are combined with canned diced tomatoes, chicken broth, and seasonings. You then puree the soup (carefully) in a blender and serve it with small dollops of plain yogurt on top. The orangish-golden color of the soup contrasts nicely with the white yogurt.

Best of all, one serving of this soup costs only about $1.10 a serving and it is packed with nutrition. One serving is only 124 calories, provides 2 grams of fat, , 390% of one’s vitamin A, 49% of vitamin C and 25% of the dietary fiber recommended for a day.

Click here to download and print a copy of the complete recipe, with nutrition analysis and cost per serving information.

How well do you know your winter squashes? Click here to see images and descriptions of 15 different winter squashes by Linda Stradley of What’s Cooking America. Her description includes taste, seasonality, & best ways to prepare the squash. She also has tips on how to purchase, prepare, and store winter squashes.

Be sure to check out colorful, antioxidant-rich recipes from other Recipe Reduxers. get the InLinkz code

Tuesday, August 21, 2012

French Onion Soup in Paris Most Memorable

French Onion Soup

The theme for Recipe Redux this month is to reflect on a most memorable vacation meal. Well, I’ve had several memorable dinners in recent years but the most memorable meal that is freshest in my mind is a delectable, scrumptious French onion soup that I enjoyed with my sister-in-law and friend in Paris just this past May.

I spent a week in Paris with my brother and sister-in-law. My sister-in-law and I spent one day checking out the Palace of Versailles. While there, we met a woman from Arizona traveling by herself in Paris. We buddied up with her all day and she joined us for dinner that evening. I had only two full days left to see Paris and I had yet to eat French onion soup. We ate dinner at a restaurant only a couple of blocks from our hotel near Notre Dame. My onion soup was to die for. The broth was full of flavor, it had lots of onions and the melted cheese and bread on top were broiled to perfection. I was in heaven.


I helped to make a French onion soup only once before when I spent a month in Switzerland for a culinary program where our class had to cook dinner for about 100 students at Shiller University every Monday night, under the direction of their chefs and staff. I learned then that the secret to a fantastic French onion soup is to cook the onions for a long, long time.

After checking a variety of onion soup recipes, I decided to use a method of baking the onion slices in the oven instead of cooking them on a range top. Both methods take a long time, but with the oven method there is less “hands-on” time. I was extremely pleased with my final result. The soup had tons of flavor. The toasted bread soaked up the broth and was delectable, especially with melted gruyere cheese on top.

Here are some prep photos:


Here is the actual recipe.

French Onion Soup

Ingredients:

3 lbs yellow onions, peeled
Non-stick cooking spray
¼ cup canola vegetable oil
½ tsp salt
4 cups low sodium chicken broth
2 cups water
¼ cup dry sherry or dry white wine
2 tsp reduced sodium beef base (such as Better Than Bouillon)
4 springs fresh thyme or 1 Tbsp dried thyme leaves
1 bay leaf
½ tsp ground black pepper, or to taste

1/2 French baguette, cut in 6 (3/4-inch thick) slices
3 oz Gruyere cheese, grated using large-hole grater

Directions:

Preheat oven to 400 degrees.

Cut onions in half and then each half into ¼-inch slices. Spray large Dutch oven with cooking spray. Add onions to pot; then add oil and salt. Stir to blend well. Place pot in oven, covered, for 30 minutes. Carefully remove pot form oven and stir well, scraping sides. Return to oven and continue to cook, covered, for another 30 minutes. Carefully remove pot from oven and stir again. Return pot to oven with lid slightly agar and continue to cook for another 90 minutes, stirring every 30 minutes.

After 2-1/2 hours total oven time, carefully remove pot from oven. Place on range top over medium-high heat and cook, stirring frequently until liquid evaporates and onions turn brown, about 15 to 20 minutes. May need to stir constantly, scraping sides and bottom of pot, towards the end of the cooking time to prevent onions from burning. Stir in chicken broth, water, sherry, beef base, thyme, bay leaf, and pepper. Bring to a boil; then reduce heat to simmer and simmer, covered, for 30 minutes.

Meanwhile, lightly toast baguette slices until just golden brown; set aside.

After soup has simmered for 30 minutes, remove bay leaf and thyme. Divide soup into 6 broiler-safe bowls or crocks. Place bowls on baking sheet. Top each bowl with 1 toasted baguette slice and sprinkle with 1/6th of cheese. Adjust oven rack so top of bowl is about 1 to 2 inches from broiler heating element. Broil just until cheese is melted and golden brown, about 2 to 3 minutes. Let cool slightly before serving.

Makes 6 servings (about 1-1/3 cups each without the cheese bread).

Nutrition Information per Serving: 315 calories,14 g total fat, 3 g saturated fat, 16 mg cholesterol, 4 g dietary fiber, 12 g protein, and 470 mg sodium. One serving of this low cost recipe provides an excellent source of vitamin C and calcium and a good source of folate and vitamin B-6.

Cost per Serving: $1.89 Pricing Note: all ingredients were at “regular” prices.

Click here to download and print this French Onion Soup recipe.

For sake of comparison, I did a nutritional analysis of both my version and Julia Child’s version (found in The Way to Cook) of French onion soup. Julia’s version used butter and olive oil, 5 tablespoons brandy, 1 cup of French vermouth, Swiss cheese and parmesan cheese. Of course, her version had more butter, alcohol and cheese than mine.


French Onion Soup
Julia Child’s
Dr. Barb’s
Calories
427
315
Total fat
15 g
14 g
Cholesterol
34 mg
16 mg
Sodium
1456 mg
470 mg
Dietary Fiber
4 g
4 g
Protein
20 g
12 g

The biggest difference, as you can see, between Julia's and mine is in the total calories and sodium.

Be sure to check out these other vacation memorable meals. get the InLinkz code

Saturday, July 21, 2012

Beat the Heat with Basil Spring Rolls

Basil Spring Rolls with Dipping Sauce

The theme for Recipe Redux this month is “beat the heat with no cook meals.” With much of the country in 90 plus degree heat the last few weeks, it’s a perfect time to think about cool, refreshing meals  and snacks that don't heat up the kitchen.

In January of this year I learned how to make basil spring rolls from my sister-in-law who is originally from Vietnam, now living in Atlanta. My oldest brother who lives in San Diego was hosting a small party and my sister-in-law and her sister decided we would throw together a number of Vietnamese dishes for the party. The basil spring rolls were a big hit att the party.

 I found the rice wrappers and rice noodles at a nearby ethnic food store. You may also find them in your larger supermarkets.

Basil Spring Roll Ingredients


My sister-in-law used a few hard-to-find ingredients, such as kafir leaves. For this month's Recipe Redux post, I decided to modify her recipe and use readily available ingredients. I’m growing both regular basil and purple basil in my vegetable garden, as well as mint and cilantro. You can use any type of basil you like, including thai basil.

Bowl of lettuces, basils, mint, & cilantro


You cook up the rice noodles in boiling water and then drain them. 
Boil rice noodles 3 to 5 minutes, then set aside

You set up an assembly line of ingredients.

Here are photos to show how to assemble the spring rolls.

Basil Spring Roll Assembly


Here is the complete recipe.

Basil Spring Rolls

Ingredients:


2 oz rice noodles

2 cups packed assorted lettuces, washed, spun dry and torn

1 cup fresh basil (green, purple, or Thai or a mixture), washed and chopped fine

2 Tbsp fresh mint leaves, chopped fine

2 Tbsp fresh cilantro leaves, chopped fine

6 large or jumbo shrimp, peeled, deveined, & cooked

6 round rice wrappers (8.5 in in diameter)


6 Tbsp hoisin sauce

1 Tbsp creamy reduced sodium peanut butter

Dash cayenne (red) pepper

1 tsp finely chopped roasted unsalted peanuts


Directions:

Bring a medium stockpot of  water to a low boil; add rice noodles and cook until tender, stirring occasionally, approximately 3 to 5 minutes. Strain, and rinse to prevent sticking. Set aside.


In medium bowl, combine lettuces, basil, mint and cilantro; set aside.


Cut each shrimp in half the length of the shrimp resulting in 12 halves; set aside.


Fill a dinner plate (that has a rim) or a casserole dish with hot water. Dip each rice wrapper in hot water for several seconds until sheet becomes soft and flexible. Lay softened wrapper on a flat surface, and place two shrimp halves, pink side down, in center of wrapper. Top with about ¼ cup of cooked rice noodles and ½ cup of lettuce/basil mixture, leaving about 2 inches uncovered on all sides of the wrapper. Fold bottom uncovered side over fillings. Fold both sides inward and roll wrapper tightly forward without tearing. Repeat this process five more times with remaining ingredients.

To make dipping sauce, place hoisin sauce, peanut butter, and cayenne pepper in microwave-safe dish; stir to combine. Microwave on high power for 30 to 45 seconds, or until warm. Transfer to serving dish; garnish sauce with chopped peanuts.


Makes  6 servings (one spring roll each).


Nutrition Information per Serving (one roll):

121 calories, 2 g total fat, 0 g saturated fat, 18 mg cholesterol, 1 g dietary fiber, 4 g protein, and 375 mg sodium. One serving of this low cost recipe provides an excellent source of vitamins A and K.

Cost per Serving: $0.61

Pricing Note: all ingredients were at “regular” prices except shrimp on sale for $5.99 per pound and peanut butter. Basil and mint were from home garden.


Click here to download and print a copy of the Basil Spring Roll recipe.
Be sure to check out these other no-cook favorite recipes. get the InLinkz code

Sunday, June 24, 2012

Nicoise-Like Potato Salad is Sure to Please

Nicoise-Like Potato Salad


I love potatoes! They are so versatile.  And contrary to what some may believe, they are healthy for you if you eat them in ways other than as deep fat fried french fries.


I was just in Paris, France the end of May with my younger brother and my sister-in-law. My brother was completing a two-week course at Sorbonne University as part of his MBA program at Georgia State. While he was in class all day, my sister-in-law and I ate and walked our way around the arrondissments of Paris, visiting as many restaurants and open air markets as we could. While in Paris, I ate Nicoise salads several times.


Nicoise (pronounced ni-swaz) salads originated in Nice, France and typically consist of potatoes, tuna, hard boiled eggs, green beans, tomatoes, and anchovies. Normally the ingredients are kept separate on the plate on a bed of lettuce and are not mixed together. In my version, however, I combined all the ingredients together and then  served it on a bed of chopped romaine lettuce. I call it Nicoise-Like Potato Salad.


So, how does my version of Nicoise salad compare to a more “typical” version? To find out, I found a grilled tuna nicoise recipe on the Whole Foods website that used grilled tuna, green beans, new potatoes, red onions, olives, cherry tomatoes and hard-boiled eggs.  The nutrition information for one serving is: 480 calories, 18 g total fat, 3 g saturated fat, 75 mg cholesterol, 10 g fiber, 35 g protein, and 660 mg sodium.


By contrast, one serving of my version provides: 316 calories, 11 g total fat, 2 g saturated fat, 109 mg cholesterol, 7 g dietary fiber, 16 g protein, and 155 mg sodium. One serving of my recipe provides an excellent source of protein, fiber, and vitamins A, B-6, C and K and a good source of thiamine, riboflavin and niacin.


Disclosure: By posting this recipe I am entering a recipe contest sponsored by the United States Potato Board and am eligible to win prizes associated with the contest. I was not compensated for my time.


Here is the complete recipe.


“Nicoise-Like” Potato Salad

This potato salad recipe combines these ingredients into a single bowl and features warm potatoes. Have all ingredients ready before cooking the potatoes, as cooking goes quickly and this salad is best if the potatoes are still warm.

Ingredients:

1-1/2 lbs medium potatoes, all about the same size, washed and peeled

1 5-oz can low sodium solid white tuna in water, drained and flaked

2 hard cooked eggs, peeled and diced

1 cup cooked green beans, cut into 1-inch pieces

1 medium tomato, cored and chopped

2 green onions, trimmed and thinly sliced

6 large pitted ripe olives, sliced

2 Tbsp olive oil

¼ cup balsamic vinegar

6 cups chopped romaine or other lettuce


Ingredients for Nicoise-Like Potato Salad


Directions:

Keep peeled potatoes covered in cold water until ready to use to prevent browning. Slice potatoes into ¼-inch slices. Place slices in 3-quart saucepan and add enough cold  water to cover. Bring to simmer over medium heat; then reduce heat to simmer and cook for 2 to 3 minutes, or until just tender. Drain cooking water. Cover pan and set aside for 3 to 4 minutes to allow potato slices to become firm.

Meanwhile in a large bowl combine tuna, eggs, green beans, tomato, green onion, olives, olive oil, and balsamic vinegar. Add drained potatoes, combining carefully to keep potato slices whole.

Place 1-1/2 cups chopped lettuce on each of four individual plates. Divide potato salad among four plates and place on top of lettuce.

Makes 4 main-dish servings.

Note: Anchovies were not used in this recipe but could be added, if desired.

Nutrition Information per Serving:

316 calories, 11 g total fat, 2 g saturated fat, 109 mg cholesterol, 7 g dietary fiber, 16 g protein, and 155 mg sodium. One serving of this low cost recipe provides an excellent source of protein, fiber, and vitamins A, B-6, C and K and a good source of thiamine, riboflavin and niacin.

Cost per Serving: $1.84

Pricing Note: all ingredients were at “regular” prices except potatoes, eggs, and green onions.


One serving of Nicoise-Like Potato Salad


Click here to download and print a copy of this recipe.

Be sure to check out these other healthy potato salad recipes.
get the InLinkz code

Thursday, June 21, 2012

Mini Smores Bites

Mini Smores Bites

Happy Birthdy, Recipe Redux.  Recipe Redux is celebrating it's first year birthday and to help ackowledge this, we were asked to create a decadent desseet -- but in miniature or as small bites.

I decided I wanted to create a recipe that included dark chocolate as anything with dark chocolate is a favorite. Given that it is summer, I think of cookouts and camping and summer fun. So for this challenge, I decided to make miniature smores. My recipe has the standard smore ingredients: graham cracker crumbs, dark chocolate chips, and miniature marshmallows, all wrapped in puff pastry. But the whole dessert is less than 4 inches along the long side. One mini turnover provides just 125 calories and costs about $0.25 each.

Here is the actual recipe.


Mini Smores Bites
Ingredients:
½ pkg (17.3 oz) puff pastry sheets (1 sheet), thawed according to package directions

8 tsp crushed graham cracker crumbs (about 1 whole cracker)

about 10 Tbsp dark chocolate chips, divided

½ cup miniature marshmallows

1 egg, slightly beaten

2 tsp granulated sugar

 Directions:
Heat oven to 400 degrees. Prepare baking sheets with parchment paper or spray with non-stick cooking spray.

Unfold pastry sheet on lightly floured surface. With rolling pin, roll sheet into a 12 x 12-inch square. Cut into 16 squares (3 x 3-inch). Place ½ teaspoon graham cracker crumbs, 1 teaspoon chocolate chips, and 3 miniature marshmallows in the center of each square. Wet the edges of the squares with water. Bring opposite corners together forming a triangle. Press edges along sides together to prevent insides from leaking out. Place on prepared baking sheet. Brush with egg and sprinkle with sugar.
Bake for 10 minutes or until pastries are golden brown. Let cool. Melt remaining 1/3 cup of chocolate chips and drizzle over tops of turnovers.

Makes 16 (mini) servings.

Nutrition Information per Serving (per mini turnover):
125 calories, 7 g total fat, 2 g saturated fat, 12 mg cholesterol, 0 g dietary fiber, 2 g protein, and 35 mg sodium.

 Cost per Serving: $0.25
Pricing Note: all ingredients were at “regular” prices except chocolate chips, marshmallows and egg.

Here are some preparation photos:
 Click here to download and print a copy of the recipe.

Hope you'll check out these other recipes from Recipe Reduxers. get the InLinkz code

Monday, May 21, 2012

Avocado & Sardine Toast

Avocado & Sardine Toast


The theme for Recipe Redux for this month is "Sea what you've been missing." We've been given the creative challenge this month of using the more obscure treasurs of the sea, such as sardines, anchovies, smelts, kelp or seaweed.

I have to admit that I'm not a big fan of sardines. I remeber eating them as a young girl, but haven't touched them in decades. I know they contain healthy fats and are an inexpensive source of protein. So, when I learned the theme for Recipe Redux this month, I promised myself that I would figure out a tasty way to add sardines to my diet.

I did some recipe searching and came across a recipe by Alton Brown (2009) for sherried sardine toast. That started me thinking. Avocado and sardines didn't sound bad. I veered from Brown's recipe in that I substituted cilantro for parsey and used twice as much, I used balsamic vinegar instead of sherry vinegar, and I used an artisan loaf of garlic bread.

Here is the complete recipe.


Avocado & Sardine Toast
Ingredients:

1 4.3 oz. tin sardines in soybean or olive oil

¼ cup finely chopped cilantro

1 Tbsp balsamic vinegar

Lemon zest from ½ lemon

4 thick (1/2-inch) slices crusty bread, such as artisan garlic or sourdough

1 ripe avocado, pitted & peeled

1 tsp fresh lemon juice

¼ tsp ground black pepper

Cilantro sprigs, for garnish


Directions:
Drain 1 Tbsp of oil from sardines and set aside. Place remaining oil in small bowl. (There should be about 3 Tbsp). Add cilantro, vinegar, and lemon zest; stir. Add sardines that have been broken into ½-inch pieces (and remove bones if desired). Let sardines marinate in oil mixture for 30 minutes.

Preheat broiler to high. Brush one side of each slice of bread with reserved 1 Tbsp of oil. Place the read, oil side up, on baking sheet and broil for 2 to 3 minutes, until golden brown and crisp. Meanwhile, mash the avocado in a small bowl with fork. Stir in lemon juice and pepper.

Equally spread the avocado among the 4 slices of toasted bread. Then top each with ¼ of the sardine mixture. Garnish with sprig of cilantro.

Makes 4 servings.

Nutrition Information per Serving:
398 calories, 10 g total fat,2 g saturated fat, 44 mg cholesterol, 5 g dietary fiber, 20 g protein, and 260 mg sodium. One serving of this low cost recipe provides an excellent source of protein, niacin, riboflavin, thiamine and folate.

Cost per Serving: $0.78
Pricing Note: all ingredients were at “regular” prices except avocados were on sale for $1 each and cilantro was on sale for $0.79 a bunch.


Click here to download and copy of the recipe.

Here are a couple of prep pictures:

Left: sardines marinating in cilantro mixture; Right: garlic bread, toasted under broiler

Be sure to check out these other recipe blogs.


get the InLinkz code

Saturday, April 21, 2012

Leek Potato Salad Perfect for Spring

Stuffed Leeks with Leek Potato Salad

The theme for Recipe Redux for April is "the first shoots of Spring." At this tme of year, you're seeing leeks, scallions, garlic scapes, pea shoots, ramps, rhubarb, and asparagus in farmer's markets and some grocery stores. This theme is courtesy of Katie@HealthyBites.


fresh leeks
I decided I wanted to do something with fresh leeks. Of course, there is always potato leek soup -- one of my favorites, but I wanted to do something a little different. Instead of a hot soup, I wanted something cold and refreshing that contained potatoes and leeks. So, I came up with a potato salad that has steamed leeks in it and can be served in leek "boats" for a more impressive presentation if desired.

Here is the complete recipe.

Stuffed Leeks with Leek Potato Salad
Ingredients:
6 medium leeks, well washed, root end sliced off
2 cups cooked potatoes, peeled (such as gold, red, or russet)
1 hard cooked egg
1/4 cup reduced fat mayonnaise made with olive oil
2 Tbsp plain nonfat Greek-style yogurt
1/2 tsp. ground black pepper, or to taste
2 Tbsp finely chopped fresh parsley

 Directions:
Clean leeks in warm water to remove any soil. Cut a 3-inch piece starting from the white end of each leek. The remaining leek greens can be used for broth or another use. Cut each 3-inch leek piece in half lengthwise.  You should have 12 pieces total. Fill a large steaming vessel with one-inch of water and bring to a boil. Place leek halves cut-side-down in a single layer in the steamer basket of the steaming vessel. Place over boiling water, cover and steam for 10 minutes. With tongs, lift cooked leeks from steamer and place in single layer on plate. Cover and refrigerate for at least 10 minutes.

When leeks have cooled, carefully removed the outermost  two layers from each leek half. You should end up with 24 leek "boats." The inside layers of each steamed leek piece will be added to the potato salad below. Do not discard.
For potato salad, combine 1 cup of chopped steamed leeks  (the innermost leaves that were not used as a boat in the last step above) with cooked potatoes, egg, mayonnaise, yogurt and pepper. Mix well. Place a generous tablespoon of the potato salad in each leek boat. Sprinkle with parsley.

Makes 24 leek boats (or 6 servings of four each).

Nutrition Information per Serving (4 leek boats):
134 calories, 4 g total fat, 0 g saturated fat, 32 mg cholesterol, 12g dietary fiber, 4 g protein, and 346 mg sodium. One serving of this low cost recipe provides an excellent source of vitamins A, C, and K.

Cost per Serving: $0.92
Pricing Note: all ingredients were at “regular” prices.

Tray of stuffed leeks with leek potato salad


Click here to download and print a copy of this Stuffed Leeks with Leek Potato Salad recipe.

Be sure to check out these other great springtime recipes from other Receipe Reduxers.

Saturday, March 31, 2012

Easy Fennel Cheese Cups

Fennel Cheese Cups

Today's blog is part of a contest created by Cabot Creamery for members of Recipe Redux. The challenge given us was to discuss how Cabot's 50% or 75% Reduced Fat Cheddar cheese made trying a "New to You" fruit, vegetable or whole grain even tastier for you and your family.

Because I've considered myself a "foodie" for many years, I go out of my way to try new foods and new recipes. So, finding a new fruit, vegetable or grain was a bit of a challenge for me.  So, I walked the aisles of a couple of supermarkets to help identify and decide what ingredients to work with for this contest.

Instead of one item, I actually came up with two new foods: fennel and millet. Although fennel can be found in many markets, it's not a vegetable I've cooked myself. It's more popular in Europe. I've eaten it when eating out and love the sweet and subtle anise-like flavor. Here is a photo of what it looks like for those that may be unfamiliar with it.
Fresh Fennel Bulb
Fennel can be eaten raw or cooked. According to the tag on the fennel I purchased, there were several helpful serving suggestions including cooking it in chicken broth, pureeing it and adding it to mashed potatoes or shredding it for a slaw and tossing with a poppy seed dressing. You can use the whole fennel plant. The bulb can be sliced thin and served raw in salads or the bulb can be sautéed, boiled, or added to mire poix. The leaves can be cut up and added to soups and stews. The feathery fronds can be used for garnish. According to USDA, one cup of raw fennel provides 27 calories, 1.1 gram protein, 0.2 gram total fat, 6.3 grams carbohydrate, 2.7 grams of fiber, 45 milligrams sodium and 17% of daily value for vitamin C.

The second item I decided to cook with was millet. This looks like bird seed, but it is food grade.

Millet
 I chose millet for several reasons. As the Nutrition Budgeteer, I am constantly on the lookout for inexpensive, yet healthy foods. Millet is a low cost grain. I found it at a natural foods store for $1.79 per pound. One pound is about 2-1/4 cups raw millet. One cup of raw millet yields about 4 cups of cooked. Doing the math, a 1-cup cooked serving costs about 20 cents. That's inexpensive, especially when compared to quinoa, amaranth, and some of the other more exotic grains available. According to USDA's Standard Reference, one cup of cooked millet provides 207 calories, 6.1 grams protein, 1.7 grams total fat, 41.2 grams carbohydrate, 2.3 grams fiber, and is a good source of thiamin and niacin. I think six grams of protein is good, considering a cup of quinoa, touted for its protein, provides 8 grams for a cooked cup. Millet is fairly "neutral" in taste, complementing the other flavors that are mixed with it.
My recipe starts by making cheese cups. For this, I was inspired by Jennifer Behm, a real estate agent from Wilmington, Delaware that won the second season of Master Chef in 2011. I attended a cooking demonstration where she made an appetizer of flat cheese crisps using only parmesan cheese for a football party. Of course, I substituted Cabot's reduced fat cheddar cheese. And, instead of flat disks, I wanted to make little cups that could hold a tasty filling. Mini muffin tins work perfectly for this. I experimented with both 50% reduced fat and 75% reduce fat Cabot's sharp cheese and both worked great for this use. Nothing but Cabot cheese is used to make the cheese cup containers. Other spices or herbs could be added, if desired. I found that the taste of the cheese was the perfect accompaniment to the fennel and millet filling I created. I wasn't sure if the Cabot reduced fat cheese would work the same way that parmesan cheese does, as their textures are different. I was pleasantly surpirsed when the cheese cups worked with both the 50% and 75% reduced fat Cabot sharp cheddar cheese. The cheese cups can be made up to several days in advance, if desired. Keep them at room temperature in an airtight plastic container lined with paper towels to absorb moisture.

Preparation of Cheese Cups
For the filling,  I looked for ideas on ways to use fennel and was inspired by Julia Child's "The Way to Cook" where she made calzones using fennel and sweet Italian sausage.  I decided to combine sweet Italian lean turkey sausage (healthier than beef Italian sausage) with the fennel, toasted cooked millet, and some chopped onion. I love the flavor combination. It was perfect for my cheese cups.
Preparation of Filling
Here is the complete recipe.

Fennel Cheese Cups
Ingredients:

Cheese Cups:
Non-stick cooking spray
8 ounces Cabot 50% or 75% reduced fat sharp cheddar cheese

Filling:
1 lean Italian turkey sausage link (about 3.4 ounces), uncooked and casing removed
1/2 medium fennel bulb, chopped (about 1 cup)
1/2 cup chopped sweet onion
1 cup cooked millet* (or other cooked whole grain)

Equipment Needed:

baking sheets
parchment paper
mini muffin pan

Make Cheese Cups: Preheat oven to 400 degrees. Line baking sheets with parchment paper. Spray parchment paper with non-stick spray. The cheese cups will likely need to be baked in batches. The parchment paper can be reused until all the cheese cups have been baked.  With large holes on a box grater, shred cheese. Place cheese in 1 tablespoon piles on parchment paper lined baking sheets, leaving about inch between piles to allow for spreading. Flatten piles slightly with hands or back of spoon. Bake 8 to 10 minutes on middle rack of oven until bubbly and slightly brown around edges. Don't over bake to prevent toughness. Remove baking sheets  from oven and let set for 1 minute. Then carefully lift each cheese circle and press in bottom of mini muffin pan. Let cool about 5 minutes before removing from muffin pan. Note: cheese cups can be made up to several days in advance, if desired. Keep at room temperature in airtight plastic container lined with paper towels to absorb moisture.

Make Filling: Brown Italian sausage in large, 10-inch non-stick frying skillet over medium-high heat until completely browned on all sides, breaking it apart as it cooks. Reduce heat to medium. Add fennel and onion. Cook, stirring occasionally, for about 4 minutes, or until vegetables are crisp tender. Stir in cooked millet. Cook over medium heat for 3 more minutes, stirring occasionally.  Remove from heat. Using a tablespoon, scoop a heaping tablespoon of filling into each cheese cup. Garnish with feathery fennel fronds, if desired. Serve.
Makes  16 appetizers or 8 servings (2 appetizers each).

Nutrition Information per Serving Using 75% Reduced Fat Cheddar Cheese):  (Note: one serving is two cheese cups.)
111 calories, 3.8 g total fat, 1.8 g saturated fat, 16.3mg cholesterol, 0.8 g dietary fiber, 11.8 g protein, and 281 mg sodium.

Nutrition Information per Serving Using 50% Reduced Fat Cheddar Cheese):  (Note: one serving is two cheese cups.)
121 calories, 5.8 g total fat, 3.3 g saturated fat, 21.3 mg cholesterol, 0.8 g dietary fiber, 10.8 g protein, and 251 mg sodium.

Cost per Serving (2 Cheese Cups per Serving): $0.88
Pricing Note: all ingredients were at “regular” prices.

* To cook millet: Toast 1 cup dry millet in a non-stick 10-inch frying pan over high heat, stirring constantly, until millet just begins to turn brown, about 3 to 5 minutes. Add  2 cups of boiling water (or low sodium broth)  to toasted millet, reduce heat to medium and cover. Gradually reduce heat to simmer and let cook covered for about 20 minutes. One cup of dry millet yields about 4 cups of cooked millet. Only 1 cup of cooked millet is needed for this recipe. The remainder can be used for another recipe or use.

Click here to download and print the complete Fennel Cheese Cups recipe.

Want to Win a Free Giveaway? 


Dr. Barb will be giving away a free cutting board and a cheese knife (compliments of Cabot Creamery) to two different people who post a comment related to this blog post. Persons will be randomly selected from all those that post a comment before April 30, 2012.

Disclaimer: I received free samples from Cabot Creamery of the cheese and giveaway items mentioned in this post. By posting this recipe, I am entering a recipe contest sponsored by Cabot Creamery cooperative and am eligible to win prizes associated with the contest.  I was not compensated for my time.