Helping families eat healthier for less

Helping families eat healthier for less

Monday, December 22, 2014

Modified Chef John Ash's Brisket Braised in Coffee

Pork Roast Slow Cooked in Coffee


The theme for Recipe Redux this month is “Grab a Book & Cook.” Because Recipe Redux is celebrating 42 months, our challenge was to grab a cookbook and prepare/modify a recipe found on page 42 or 142.

I have a four-shelf bookcase filled with nothing but cookbooks, so selecting just one cookbook for this month’s Recipe Redux was a challenge. After looking at a few to see what recipes fell on pages 42 or 142, I selected Chef John Ash’s Cooking One on One: Private lessons in simple, contemporary food from a master teacher. I have met John a couple of times at the Culinary Institute of America in Napa Valley and he is not only extremely knowledgeable about culinary topics, but he is also very approachable and kind.

On page 142 of his cookbook is a recipe for Brisket Braised in Coffee. Have leftover coffee? Hate to throw it away? This is a great way to use it.

I modified Chef Ash’s original recipe in several ways. While at the supermarket, ready to buy the needed ingredients, I decided to substitute a pork end roast for the brisket listed in the original recipe. This is because the brisket was $7.49 per pound, meaning that a 4 pound piece of meat would be about thirty dollars. The pork end roast, on the other hand, was $1.49 per pound, or about six dollars total. I also decided to use a slow cooker to prepare this recipe instead of a 300 oven for 3 hours. I wanted to let it cook for hours so that the flavors would meld and the meat would be ultra tender. I also cut the amount of olive oil in half, reduced the amount of salt, and used canned tomatoes with no salt added in place of regular canned tomatoes.

Here are photos of the preparation steps:

Top: browning the roast; Middle: adding strong coffee; Bottom adding other ingredients.
Here is the roast cooking in the slow cooker:

All ingredients cooking in slow cooker

Here is the modified recipe:

Modified Brisket Braised in Coffee

Ingredients:
4 pounds pork end roast (with bones), trimmed of excess fat
1 teaspoon freshly ground black pepper
1/4 teaspoon salt
1 tablespoon olive oil
3 large yellow onions (about 1-1/2 to 2 pounds total), peeled and sliced
1/4 cup sliced fresh garlic (about 1 medium bulb or 12 cloves)
2 tablespoons (or more) pure chile powder, such as ancho or Chimayo
2 teaspoons whole fennel seeds
2 teaspoons ground cumin
2/3 cup packed light or dark brown sugar
2/3 cup apple cider vinegar (with mother, if desired)
4 cups strong brewed coffee
1 cup homemade chicken, meat, or vegetable stock or broth
1 14-1/2 ounce can no salt added diced tomatoes with their juice

Directions:
Season meat with salt and pepper. Heat 1 tablespoon oil in large Dutch oven and brown the meat on all sides over medium-high heat. Remove meat and place in slow cooker. Add onions and garlic and sauté over medium-high heat stirring frequently until they just begin to color. Add the chile powder and sauté, stirring, for a minute more, until fragrant. Add the fennel, cumin, sugar, vinegar, coffee, stock, and tomatoes, and bring to a simmer. Pour mixture over meat in slow cooker. Cover and cook for 4 to 6 hours on high heat (or 8 to 10 hours on low heat) or until meat is tender.

Remove meat from slow cooker and place on cutting board. Puree the braising liquids and vegetables until smooth using an immersion blender (or transfer to a food processor or blender and puree in batches). Season with salt and pepper, as needed. Slice meat thinly across the grain. Serve meat with warm sauce spooned over it.
Serves 8.

Nutrition Information per Serving:

587 calories, 30 g total fat, 10 g saturated fat, 144 mg cholesterol, 2 g dietary fiber, 47 g protein, and 365 mg sodium. One serving of this low cost recipe provides an excellent source of protein, thiamin, niacin, and vitamin B-6.

This roast is good the day it is prepared, as well for a few days later.

Monday, September 22, 2014

Dehydrated Mushrooms Easy To Do


Dried Mushrooms Are Easy To Do


The Recipe Redux theme this month is to think dehydrated favorites using a food dehydrator, a low, slow oven, or natural sunshine to preserve natural healthfulness. I decided to try dehydrating mushrooms. I have purchased dried mushrooms in a package before, like porcini and wood ear, but had never dried drying my own before this month’s challenge.

I started with a bunch of white button mushrooms. Of course, you can use any type of mushroom.
You start by cleaning them. I used a dry paper towel and rubbed them gently to remove any visible dirt. Several sources suggest that one not use water to clean them as this adds too much moisture to the mushrooms and they will take longer to dry.


I then used a slicer to cut the mushrooms into uniform slices. This slicer can be used for cooked eggs and strawberries, as well as mushrooms. It creates uniform slices. You can also use a sharp knife or a mandolin.


Place the sliced mushrooms in a single layer on a dry baking sheet. Do not spray with cooking spray or coat with oil. I also decided to experiment and seasoned half of the slice mushrooms with dried thyme. You can use any of your favorite spices. Curry, lemon pepper, or basil are other ideas.


Bake in a 150 to 170 degree oven for one hour. The lowest temperature my oven goes is 170 degrees. Several sources I read said 150 degrees. After one hour, turn the slices over. Place back in oven and cook for another hour.  Check the mushrooms. They should be dry and brittle and crack when you bend them. If not this dry, put back in oven and cook for another hour.
Let the dry, cooked mushrooms cool completely on a rack.
Once dry, place in a jar with a tight fitting lid. Store in a dark, cool place.


Dried mushrooms can be rehydrated in boiling water or soup. Use them in pasta dishes, stews, soups, omelets, or a variety of dishes.

Monday, August 4, 2014

Powerhouse Oatmeal Parfait

Powerhouse Oatmeal Parfait Packs a Punch


By posting this recipe I am entering a recipe contest sponsored by National Dairy Council and the Quaker Oats Center of Excellence and am eligible to win prizes associated with the contest. I was not compensated for my time.


I love oatmeal. I eat oatmeal for breakfast normally about 5 out of 7 mornings a week. It’s my favorite breakfast. I change it up by adding different toppings, such as ground cinnamon, cocoa nibs, walnuts, dried plums, dried apricots, frozen blueberries, and other foods. So, I was excited to hear about a recipe contest featuring oatmeal and lowfat or nonfat dairy products, of which I am also a big fan.

Most people, in fact 99%, don’t meet the recommended daily requirement for whole grains; and 85% don’t meet the daily requirement for dairy. So, one easy way to help meet these requirements is to start your day with a bowl of oatmeal and milk or yogurt.

For this contest, I decided to create a recipe for oatmeal that was packed full of nutrients and that anyone would love to eat. In my recipe, I cook the oatmeal in fat free milk instead of water for added nutrition with a little bit of cinnamon. I then layer the cooked oatmeal with lowfat vanilla yogurt, fresh raspberries, and toasted almonds for a nutritious breakfast parfait. Serving it in a parfait glass instead of a regular bowl adds to the fun factor and eye appeal.

This parfait provides a powerhouse of nutrients as just one serving provides an excellent source of protein (22 grams), fiber (10 grams), calcium (54%), and vitamins D, C, and B-12. It is also fast and easy to make on a busy weekday morning.

Powerhouse Oatmeal Parfait Packs Nutrients


Here’s the recipe:

Powerhouse Oatmeal Parfait

Ingredients:
1/2 cup old fashioned or quick cooking oatmeal
1 cup fat free milk (can be lactose-free, if desired)
1/2 teaspoon cinnamon
1/2 cup fresh raspberries
6 ounces lowfat or fat free vanilla yogurt
1 tablespoon sliced almonds, toasted

Directions:
Cook oatmeal according to package directions, cooking in milk instead of water and omitting salt if listed. Stir in cinnamon. Place half of oatmeal in bottom of 12-ounce or larger parfait glass; press down with spoon to eliminate air pockets. Top with half of yogurt, then half of raspberries. Repeat layers one more time. Sprinkle top with almonds.
Makes 1 serving.
Note: Recipe can be doubled or tripled, if desired.

Nutrition Information per Serving:
391 calories, 7 g total fat, 1 g saturated fat, 8 mg cholesterol, 10 g dietary fiber, 22 g protein, and 189 mg sodium. One serving of this low cost recipe provides an excellent source of protein, fiber, calcium, vitamins D, C B-12, and thiamin.


Tuesday, July 22, 2014

Peach Cake with Peach Schnapps is a Great Way to Use Summer Peaches


Peach Cake Uses Summer Peaches and Peach Schnapps


The theme for Recipe Redux for July is to show others how you like to cook, bake, or mix-it-up with spirits, extracts or other alcohols. What’s your healthy recipe with spirit? What immediately came to my mind was a great tasting and great looking peach cake I made several years back that uses peach schnapps to intensify the peach flavor of the cake.

I found this Summer Peach Cake recipe in the July/August 2011 issue of my favorite magazine, Cook’s Illustrated. I love this magazine because they do an outstanding job of creating wonderful recipes and testing them umpteen times to get just the right cooking method and the perfect amount or proportion of ingredients. You also refresh your memory or learn many food science concepts.

The peach cake uses 2 and a half pounds of fresh peaches in one 9-inch round cake. Prior to mixing the peaches in the cake, you bake the slices in the oven to help intensify their flavor and caramelize their juices in order to prevent a runny cake. Yvonne Ruperti, the person who created this recipe for Cook’s Illustrated, tried lots of ways to enhance the peach flavor, from using dried peaches to peach-flavored yogurt. The peach schnapps was the winner. I was extremely pleased with the final product. It looked fabulous, like I had spent a lot of time (which I didn’t). It tasted great and had great peach flavor.

By getting the peaches on sale, I was able to make this cake for $6.27 total, or $0.63 a serving for 10 servings. A great buy for an impressive-looking summer dessert.


Here is the recipe from Cook’s Illustrated:

Summer Peach Cake

From Cook’s Illustrated, July & August 2011, page 24-25.

Serves 8 to 10


2-1/2 pounds peaches, pitted and cut into 1/2-inch-thick wedges

5 tablespoons peach schnapps

4 teaspoons lemon juice

6 tablespoons plus 1/3 cup granulated sugar

1 cup (5 ounces) all-purpose flour

1-1/4 teaspoons baking powder

3/4 teaspoon salt

1/2 cup packed (3-1/2 ounces) light brown sugar

2 large eggs

8 tablespoons unsalted butter, melted and cooled

1/4 cup sour cream

1-1/2 tablespoons vanilla extract

1/4 teaspoon plus 1/8 teaspoon almond extract

1/3 cup panko bread crumbs, crushed fine


  1.  Adjust oven rack to middle position and heat oven to 425 degrees. Line rimmed baking sheet with aluminum foil and spray with vegetable oil spray. Gently toss 24 peach wedges with 2 tablespoons schnapps, 2 teaspoons lemon juice, and 1 tablespoon granulated sugar in bowl; set aside.
  2. Cut remaining peach wedges crosswise into thirds. Gently toss chucks with remaining 3 tablespoons schnapps, remaining 2 teaspoons lemon juice, and 2 tablespoons granulated sugar in bowl. Spread peach chunks in single layer on prepared sheet and bake until exuded juices begin to thicken and caramelize at edges of sheet, 20 to 25 minutes. Transfer sheet to wire rack and let peaches cool to room temperature, about 30 minutes. Reduce oven temperature to 350 degrees.
  3. Spray 9-inch springform pan with vegetable oil spray. Whisk flour, baking powder, and salt together in bowl. Whisk brown sugar, 1/3 cup granulated sugar, and eggs together in second bowl until thick and homogeneous, about 45 seconds. Slowly whisk in butter until combined. Add sour cream, vanilla, and 1/4 teaspoon almond extract; whisk until combined. Add flour mixture and whisk until just combined.
  4. Transfer half of batter to prepared pan; using offset spatula, spread batter evenly to pan edges and smooth surface. Sprinkle crushed bread crumbs evenly over cooled peach chunks and gently toss to coat. Arrange peach chunks on batter in even layer, gently pressing peaches into batter. Gently spread remaining batter over peach chunks and smooth top. Arrange reserved peach wedges, slightly overlapped, in ring over surface of cake, placing smaller wedges in center. Stir together remaining 3 tablespoons granulated sugar and remaining 1/8 teaspoons almond extract in small bowl until sugar is moistened. Sprinkle sugar mixture evenly over top of cake.
  5. Bake until center of cake is set and toothpick inserted in center comes out clean, 50 to 60 minutes. Transfer pan to wire rack cool 5 minutes. Run paring knife around sides of cake to loosen. Remove cake from pan and let cool completely, 2 to 3 hours. Cut into wedges and serve.


Peach Cake Preparation
Be sure to check out these other spirit-inspired recipes.


Thursday, May 22, 2014

Citrus Tea Infused Millet Cheese Tarts

Tea-Infused Millet Cheese Tarts

I’m a HUGE tea drinker. Have been for decades. It’s my preferred breakfast beverage and during the winter I drink it all day long.  I like green, black, white, herbal, all flavors. I haven’t, however, used tea in cooking applications except one time many years ago when I made brownies that used blackberry tea. They were amazing. So I was very excited when I found out that the theme for this month’s Recipe Redux is cooking with tea. Our task is to create a healthy recipe that is inspired by tea.


I decided to use one of my favorite teas, Good Earth Citrus Kiss. I made millet the usual way, except that I used a strong citrus-flavored tea in place of water or broth. It came out delicious. These cheese cups are easy to do and are great for summer party appetizers. Don’t have millet on hand? Just substitute brown rice or quinoa.

Here’s the recipe:

Tea-Infused Millet Cheese Cups

Ingredients:
Filling:
1 cup dry millet (uncooked)
2 cups strong tea made from 3 citrus or lemon flavored tea bags
1 lean Italian turkey sausage link (about 3.4 ounces), uncooked and casing removed
1/2 medium fennel bulb, chopped (about 1 cup)
1/2 cup chopped sweet onion

Cheese Tarts:
Non-stick cooking spray
8 ounces 50% or 75% reduced fat sharp cheddar cheese

Equipment Needed:
baking sheets
parchment paper
mini muffin pan


Make Filling:
Toast dry millet in a non-stick 10-inch frying pan over medium-high heat, stirring constantly, until millet just begins to turn brown, about 3 to 5 minutes. Add  2 cups of strong tea to toasted millet, reduce heat to medium and cover. Gradually reduce heat to simmer and let cook covered for about 20 minutes. One cup of dry millet yields about 4 cups of cooked millet. Only 1 cup of cooked millet is needed for this recipe. The rest can be used for another recipe or use.

Brown Italian sausage in large, 10-inch non-stick frying skillet over medium-high heat until completely browned on all sides, breaking it apart as it cooks. Reduce heat to medium. Add fennel and onion. Cook, stirring occasionally, for about 4 minutes, or until vegetables are crisp tender. Stir in cooked millet. Cook over medium heat for 3 more minutes, stirring occasionally.  Remove from heat. Set aside.

Make Cheese Tarts: Preheat oven to 400 degrees. Line baking sheets with parchment paper. Spray with non-stick spray. The cheese cups will likely need to be baked in batches. The parchment paper can be reused until all the cheese cups have been baked.  With large holes on a box grater, shred cheese. Place cheese in 1 tablespoon piles on parchment paper lined baking sheet, leaving about inch between piles to allow for spreading. Flatten piles slightly with back of spoon. Bake 8 to 10 minutes on middle rack of oven until bubbly and slightly brown around edges. Don't over bake to prevent toughness. Remove baking sheet  from oven and let set for 1 minute. Then carefully lift each cheese circle and press in bottom of mini muffin pan. Let cool about 5 minutes before removing from muffin pan. Note: cheese cups can be made up to several days in advance, if desired. Keep at room temperature in airtight plastic container lined with paper towels to absorb moisture.

Assembly:
Using a tablespoon, scoop a heaping tablespoon of filling into each cheese tart. Garnish with feathery fennel fronds, if desired. Serve.

Makes 16 appetizers or 8 servings (2 appetizers each).

Nutrition Information per Serving using 75% reduced fat Cheddar cheese):  (Note: one serving is two cheese cups.)
111 calories, 3.8 g total fat, 1.8 g saturated fat, 16.3 mg cholesterol, 0.8 g dietary fiber, 11.8 g protein, and 281 mg sodium.
Nutrition Information per Serving using 50% reduced fat Cheddar cheese):  (Note: one serving is two cheese cups.)
121 calories, 5.8 g total fat, 3.3 g saturated fat, 21.3 mg cholesterol, 0.8 g dietary fiber, 10.8 g protein, and 251 mg sodium.

Cost per Serving (2 Cheese Cups per Serving): $0.88
Pricing Note: all ingredients were at “regular” prices.

Millet browning in pan before tea is added

 Be sure to check out these other tea-inspired creations.

Saturday, May 3, 2014

Gluten Free Chipotle Turkey Sliders are a Winner for Everyone at the Party

Gluten Free Chipotle Turkey Sliders


I received free samples of Breton Gluten Free Original with Flax and Breton Gluten Free Herb and Garlic Crackers from Dare Foods Incorporated mentioned in this post. By posting this recipe, I am entering a recipe contest sponsored by Dare foods Inc. and am eligible to win prizes associated with this contest. I was not compensated for my time.


In celebration of Celiac Awareness Month, Dare Foods offered a challenge to Recipe Reduxers. Create a tasty recipe using their new gluten free crackers. Breton has recently introduced two new gluten free crackers with the same great Breton quality, taste and texture: Breton Gluten Free Original with Flax Seeds and Breton Gluten Free Herb and Garlic. I found Breton’s gluten free crackers at my local Shop Rite supermarket. Regular price is $2.49 per box.  I used the Herb and Garlic for my recipe below although either variety would have been fine.


These crackers taste delicious. They have great tender-crisp texture and don’t have a “diet” taste or feel to them. They worked perfect as the “bun” for my sliders. I also used 12 of these crackers, crushed, to the turkey mixture. I served the sliders open-faced on crackers on a bed of shredded kale and topped with chipotle-flavored mayonnaise and a slice of cherry tomato.


Sliders are always popular. These bite-size burgers are perfect for entertaining. Typical sliders of course are served on a wheat bun, which may be whole grain if you’re lucky. But a person avoiding gluten would normally have to eat the slider without the bun. Not with the sliders below. They are completely gluten free.


Here is the complete recipe.
Gluten-Free Chipotle Turkey Sliders

Ingredients:
1 4.76-ounce box of Breton Gluten Free Herb & Garlic Crackers (approximately 32 crackers), divided
1 pound lean ground turkey (93% lean)
1 large egg, slightly beaten
2 medium green onions, trimmed and sliced thin
2 tablespoons tomato sauce
1/4 teaspoon ground chipotle pepper, or to taste
2 medium kale leaves, shredded
10 tablespoons chipotle-flavored reduced-fat mayonnaise
7 cherry tomatoes, sliced crosswise
Directions:
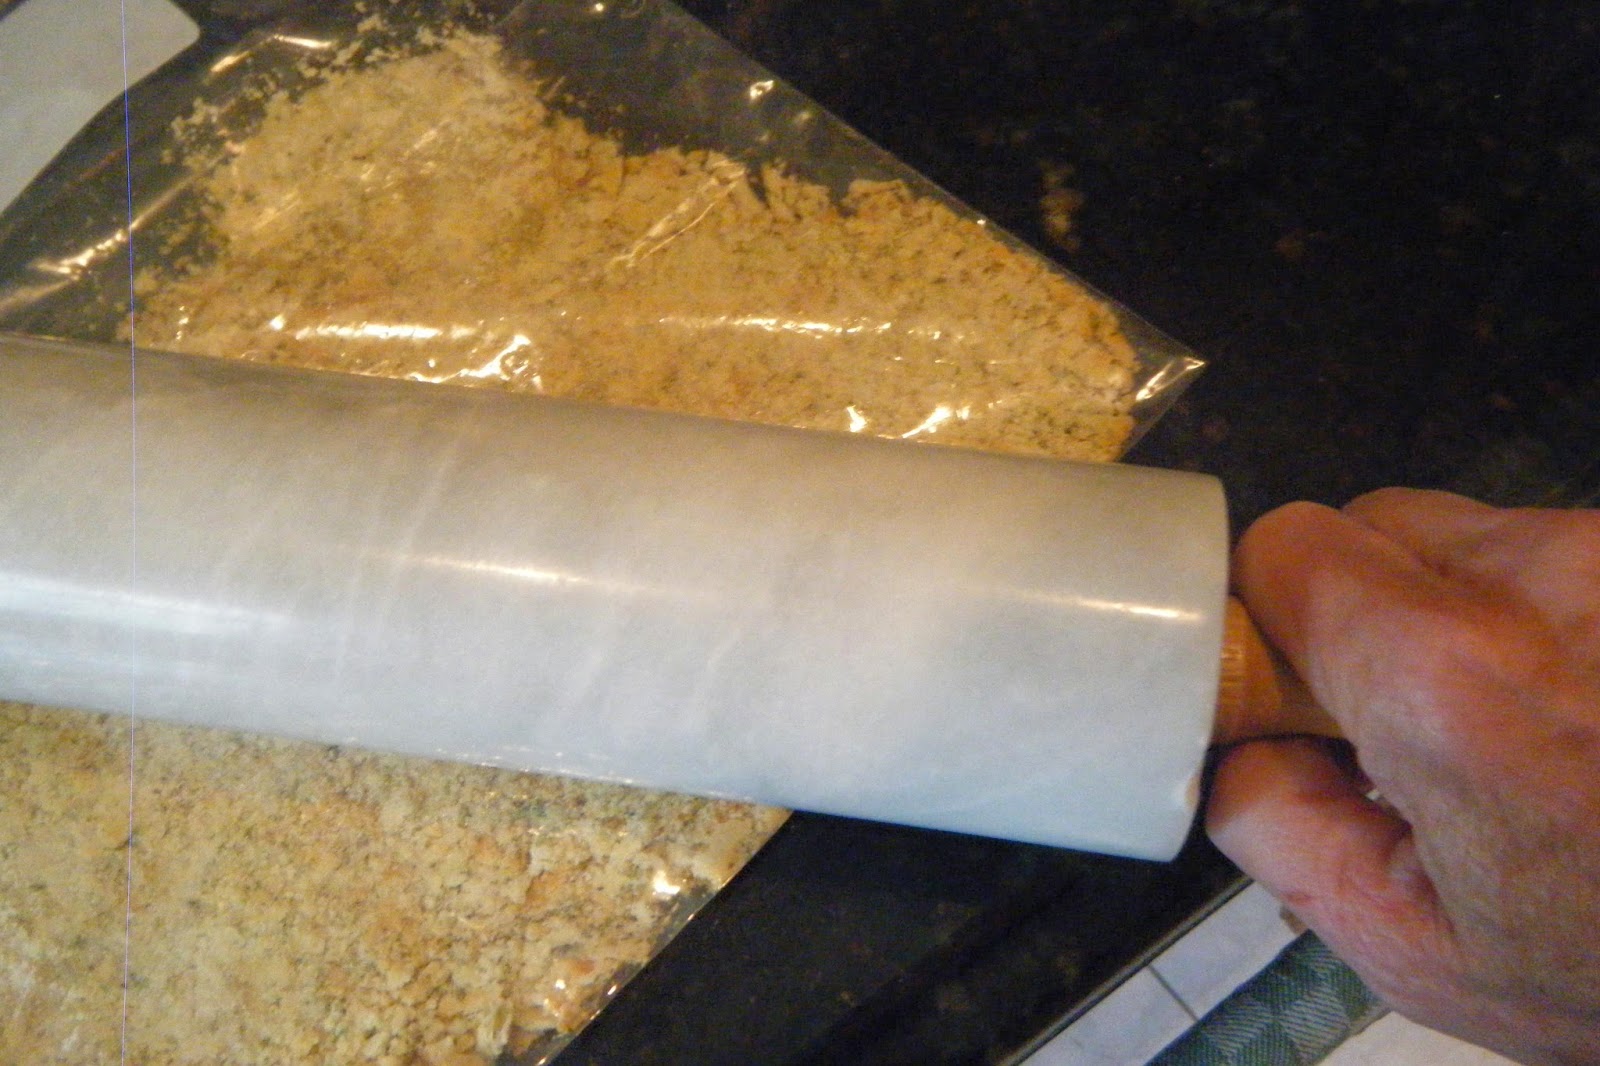
Place 12 Breton Gluten Free Crackers in a plastic bag and crush with a rolling pin. Combine crushed crackers with turkey, egg, green onion, tomato sauce, and chipotle pepper in bowl. Form 20 one-inch balls. Place patties in single layer in large non-stick skillet over medium-low heat, flattening them as you place them in pan. Cover and cook, turning 2 or 3 times, for about 10 to 12 total minutes or until internal temperature reaches 165 degrees on meat thermometer. Repeat pan frying process until all patties have been cooked.
To assemble, place 20 Breton Gluten Free Crackers on serving tray. Top each cracker with shredded kale, then cooked turkey patty. Top each patty with about 1/2 teaspoon of chipotle-flavored mayonnaise and one cherry tomato slice.

Makes 20 appetizer servings.
Nutrition Information per Appetizer Serving:
82 calories, 4.2 g total fat, 1.3 g saturated fat, 26 mg cholesterol, 0 g dietary fiber, 4.8 g protein, and 71 mg sodium.
Cost per Serving: $0.39
Pricing Note: all ingredients were at “regular” prices except ground turkey was on sale for $3.99 a pound.

Here are some prep photos.

Crush 12 crackers to add to turkey mixture

Turkey sliders cooking on stovetop

Be sure to check out these other gluten free favorites using Breton crackers. 

Tuesday, April 22, 2014

Clay Pot Chicken for Easy Entertaining


Clay Pot Chicken
Treasured cookware is the theme this month for Recipe Redux.  I decided to pull out my clay cooker that my oldest brother gave me over 25 years ago.  It’s a Romertopf clay baker.

Romertopf Clay Baker

Clay pots have been around for centuries in all parts of the world. Clay pot cooking can be healthy as some recipe call for very little fat. The moisture in the pot (from soaking) helps the cooked food stay moist, making your finished dish more flavorful, tender and succulent.

I decided to do a classic baked chicken using one of the recipes that came with the dish. However, I modified it (imagine that) to use chicken parts instead of a whole chicken and I added more veggies.   I used chicken thighs and split chicken breasts that were both on sale. This recipe is perfect for entertaining company because everything gets cooked together in one pot. You can assemble the dish ahead of time and then it cooks, unattended, for about an hour and 15 minutes. No basting or watching  required.

According to The Best of Clay Pot Cooking by Dana Jacobi, there are six rules of cooking in clay.
Clay Pot Cooking by Dana Jacobi

  1. Always soak unglazed pots completely submerged in water before using. Soak new pots for 30 minutes; after that, 15 minutes.
  2. Never subject a clay pot to quick or extreme changes in temperature. (That’s why you put it in a cold oven and bring it up to the desired temperature.) Don’t add cold liquid to a hot pot.
  3. When opening a pot after cooking, tilt the cover away from you to prevent steam from hitting your face.
  4.  Use long oven-proof mitts when handling a hot clay pot. 
  5. Don’t store food in a clay pot; the flavors will seep into the clay.
  6.  Never use scouring powder or steel wool on a clay pot. Scrub with a fiber or nylon pad(or a stiff brush).

Individual Serving of Clay Pot Chicken

Here is the complete recipe.
Clay Pot Chicken


Ingredients:
1 medium onion, peeled and cut into wedges
1 large sweet potato, peeled and cut into 1-inch chunks
2 medium Yukon gold potatoes, peeled and cut into 1-inch chunks
4 carrots, peeled and cut into 1-inch slices
3 inner stalks and leaves of celery
4 lbs. chicken parts (with or without skin)
Non-stick cooking spray
1 teaspoon dried rosemary
1 teaspoon dried thyme

Directions:
Soak clay dish in water to cover for 15 minutes. Place, onion, sweet potato, gold potatoes, carrot, and celery onto bottom of clay pot. Place chicken pieces in single layer on top of vegetables.  Spray chicken with non-stick spray and season top of pieces with rosemary and thyme. Cover and place in cold oven turned to 450 degrees for about 75 minutes, or until chicken registers 165 degrees on meat thermometer.

Makes 6 servings.

Nutrition Information per Serving:
301 calories, 8 g total fat, 2 g saturated fat, 86 mg cholesterol, 4 g dietary fiber, 31 g protein, and 153 mg sodium. One serving of this low cost recipe provides an excellent source of protein, vitamin A and C, niacin and B-6 and a good source of riboflavin, thiamin, and fiber.

Cost per Serving: $1.41

Pricing Note: all ingredients were at “regular” prices except  potatoes which were on sale for $2.99 for a 5-pound bag.

Saturday, March 22, 2014

Salmon Patties Help Celebrate March


Salmon Patties Perfect for Spring Menus


In celebration of St. Patties day, the Recipe Redux theme for March is patties, whether they be beef, chicken, tuna, bean, or whatever. I love salmon so I decided to make fresh salmon patties. Add, in keeping with St. Patrick's Day theme, I added dill for a bit of the green.

Fresh or frozen salmon can be used for this recipe, but I find it is best with fresh. The salmon in this recipe is chopped by hand instead of using a food processor to give the cakes a courser texture.

 Here is the recipe:

Dilly Salmon Patties

Ingredients:

1 pound fresh or frozen (thawed) salmon fillet, pinbones and skin removed if needed

1 slice whole wheat bread, crusts removed and discarded, chopped fine

2 tablespoons lowfat mayonnaise

¼ cup finely chopped green onion

1 lemon, divided (1/2 used for juice; other half cut into wedges for garnish)

2 tablespoons fresh dill or 2 teaspoons dried dill

¼ teaspoon salt

½ cup white wheat flour

2 large eggs, lightly beaten

1 cup panko bread crumbs

2 tablespoons canola oil


Directions:

Line a baking sheet with foil. Set aside.

Cut salmon with knife into pieces about ¼-inch in size. In medium bowl, combine chopped salmon, bread, mayonnaise, onion, lemon juice from half a lemon, dill, and salt. Using a ¼-cup dry measure, make 6 patties and place them on the foil-lined baking sheet or plate. Freeze the patties for about 15 minutes.

Dip each patty into flour, then egg, and, lastly, the panko bread crumbs. Heat oil in large non-stick skillet over medium heat. Add the patties. Cook about 3 minutes on each side. You will likely need to cook the patties in two batches, depending on the size of the skillet. Serve with lemon wedges.

Makes 6 servings.


Nutrition Information per Serving:

298 calories, 12 g total fat, 2 g saturated fat, 42 mg cholesterol, 2 g dietary fiber, 20 g protein, and 341 mg sodium. One serving of this low cost recipe provides an excellent source of protein and several B vitamins.


Cost per Serving: $1.61

Pricing Note: all ingredients were at “regular” prices except the green onions which were on sale for $0.59 a bunch.


Click here to download and print a copy of this recipe.


Be sure to check out these other March patties.

Tuesday, March 11, 2014

Macaroni and Cheesy Cauliflower


Macaroni and Cheesy Cauliflower


I received a gift card to offset the expense of my ingredients. By posting this recipe I am entering a recipe contest sponsored by the California Milk Advisory Board and am eligible to win prizes associated with the contest. I was not compensated for my time.


March is National Nutrition Month and the theme this year is "Enjoy the Taste of Eating Right." It’s also time for another recipe challenge. This time the California Milk Advisory Board  is celebrating "dairy good" nutrition by challenging Recipe Reduxers to lighten up some of their favorite recipes with real California dairy foods. The hardest part for me was deciding which California dairy products to use, as there are hundreds of them available nationwide.


California leads the nation in production of milk, butter, and ice cream. They are number two in cheese and yogurt production. While they may not be the leader in cheese production, they are at an all-time high.  Real California milk and dairy products are sold nationwide and can be identified with the Real California Milk or Real California cheese seals on packaging. Look for the Real California Milk seal on packages of butter to identify dairy products made exclusively with milk produced on California dairy farms.

Click on RealCaliforniaMilk for an extensive list of milk and dairy products, recipes, cooking tips and numerous cooking techniques on proven ways to work with California dairy products.  Also, go to the website of the Dairy Council of California for information and resources for educators and schools, health & wellness providers, and consumers who want to eat healthier for themselves and their families.


This “healthier” mac and cheese shows how California dairy products (milk, butter and cheese) can play an important role in a healthy diet. One trick is to use an extra sharp cheese so that less of it is used than in a “typical” mac and cheese recipe. And sprinkle some of the cheese on top to get more cheese flavor. The butter is just enough to add wonderful flavor and nonfat milk is used to make a lower fat cheese sauce. Also, because cauliflower is such a hot trendy vegetable right now, I decided to use it instead of two-thirds of the macaroni that would be used in a typical mac & cheese recipe. This substitution alone saves close to 600 calories for the whole recipe. Kids and adults will love the cheesiness of this comfort food favorite.


Macaroni and Cheesy Cauliflower

Ingredients:


1 cup dry macaroni (whole wheat or high fiber)
1 medium head cauliflower, trimmed, cored, and cut into florets (about 5 cups)
2 tablespoons California butter
1 medium onion, peeled and finely chopped
3 tablespoons whole wheat flour
3 cloves garlic, peeled and minced
2 cups California nonfat milk
1/2 cup frozen peas
6 ounces California extra sharp Cheddar cheese, shredded, divided
1/2 teaspoon freshly ground black pepper
1/8 teaspoon ground chipotle pepper, or to taste
1/4 teaspoon freshly grated nutmeg
1-1/2 cups fresh whole grain bread crumbs
1 tablespoon dried parsley

Directions:
Preheat oven to 350 degrees.

Boil macaroni in large pot of boiling water, covered, until tender, about 10 minutes (or according to package directions). Add cauliflower florets to pasta water during last 7 minutes of cooking. Remove pasta and cauliflower from pot; set aside. Reserve 1 cup cooking water.
Melt California butter in large pot over medium-low heat. Add onion and cook until onion is soft, about 5 minutes. Stir in flour and garlic and cook 1 minute, stirring constantly. Whisk in California milk, garlic, and reserved cooking liquid. Cook over medium heat 7 to 10 minutes, or until sauce is thickened, stirring constantly.  Remove from heat. Stir in peas, all but 1/2 cup shredded California Cheddar cheese, ground peppers, and nutmeg; stir until cheese is melted. Stir in cooked cauliflower and macaroni.

Spray a 9 x 13-inch baking dish with cooking spray. Transfer cauliflower mixture to dish and spread evenly.  Top with bread crumbs, remaining 1/2 cup shredded California Cheddar cheese, and parsley. Bake 30 minutes, or until casserole is hot and bubbly. Place under broiler for 2 to 3 minutes, until breadcrumbs are crisp and lightly brown.
Makes 6 to 8 servings

Nutrition Information per Serving (1/8th of recipe):
247 calories, 11 g total fat, 7 g saturated fat, 31 mg cholesterol, 4 g dietary fiber, 12 g protein, and 266 mg sodium. One serving of this low cost recipe provides an excellent source of protein, vitamins C and K-1, calcium, and folate and a good source of riboflavin and thiamine.

 Cost per Serving (1/8 of recipe): $0.83
Pricing Note: all ingredients were at “regular” prices.

Be sure to check out these other "healthier" favorites.