Helping families eat healthier for less

Helping families eat healthier for less

Wednesday, August 21, 2013

Refrigerator Zucchini Pickles


Refrigerator Zucchini Pickles
Raising the Bar on food in a jar is the Recipe Redux theme for August.

I have an abundance of zucchini. I only planted one zucchini plant in my own vegetable garden, but also get zucchini in my weekly CSA package. So when I learned about the theme of this month’s Recipe Redux, I decided to make zucchini pickles.
I did some web surfing and came across a recipe from McCormick for refrigerator bread and butter pickles. I started with this recipe for my inspiration because it seemed easier than “traditional” pickle recipes. You simply put thinly sliced cucumbers (zucchini in my case) in a canning jar, heat a mixture of white vinegar, sugar and spices and pour it over the cuke slices. Then you put the jar in the refrigerator and shake it once a day for 3 to 5 days. No real canning involved. However, this means the jar must be kept refrigerated, but it is good for up to 2 months.
Here are photos of the preparation
Preparation of Refrigerator Zucchini Pickles
 
I was very pleased with the way the zucchini pickles came out. A new way to enjoy zucchini!
 
Here is the complete recipe:

                   Refrigerator Zucchini Pickles


Ingredients:

2 pounds zucchini, trimmed

2/3 cup agave syrup or honey

3 cups distilled white vinegar

1/4 cup thinly sliced red onion

2 tsp kosher salt

2 tsp mixed pickling spice

2 tsp mustard seed

2 tsp ground turmeric

2 tsp dried dill weed

 
Directions:

 Using mandolin or knife, carefully slice zucchini into 1/16th-inch slices. Divide sliced zucchini equally between two clean quart size canning jars. Mix remaining ingredients in medium saucepan and bring to a boil over medium-high heat, stirring occasionally to dissolve sugar. Reduce to low and simmer for 5 minutes. Pour vinegar mixture over zucchini in jars, leaving at least 1/4-inch headspace. Let cool. Screw on metal lids and shake to distribute contents. Refrigerate pickles. Shake jars once a day for 3 to 5 days to redistribute seasonings. Store in refrigerator for up to 2 months.

 
Makes 2 quarts (16 servings).

 Nutrition Information per Serving (1/16th of recipe):
66 calories,0 g total fat, 0 g saturated fat, 0 mg cholesterol, 1 g dietary fiber, 1 g protein, and 274 mg sodium. One serving of this low cost recipe provides a good source of vitamin C.

Cost per Serving: $0.39

Pricing Note: all ingredients were at “regular” prices.
 
Click here to download and print a copy of this recipe.
 
Be sure to check out these other canned favorites from fellow Recipe Reduxers.


Saturday, August 10, 2013

Nothing Says Summer Like Popsicles - Avocado Raspberry Popsicles


Avocado Raspberry Popsicles

Disclaimer: I received free samples of California Avocado mentioned in this post. By posting this recipe I am entering a recipe contest sponsored by California Avocado and am eligible to win prizes associated with the contest. I was not compensated for my time.
 
I grew up in Southern California where Hass avocados are widely available. My brother used to rent a house that had several avocado trees  on the property and he’d let me pick as many as I could carry in a large grocery paper bag. What great memories I have from those days.

There are many reasons to love avocados. I love their taste and creamy texture. They’re also loaded with “good” monounsaturated fats, the predominant type of fat found in Mediterranean-style diets. A one-ounce serving, or 1/5 of a medium avocado provides 3 grams of monounsaturated fat and 0.5 grams of polyunsaturated fat. Contrary to some beliefs, one serving of avocado is only 50 calories, provides 2 grams of fiber, and has no sodium or cholesterol.

California avocados are in peak season from March through September, making them perfect for summer gatherings.

Because avocados provide “healthy” fats, they are a good substitute for unhealthy saturated fats. So, for instance, try spreading avocado on your toast or bagel in the morning instead of butter, or use mashed avocado instead of mayonnaise on your sandwich bread, or dip raw veggies into guacamole instead of a sour cream-based dip. Although I haven’t yet tried this, I’ve read that avocado can be substituted for butter or oil in baked good recipes, such as cookies, cakes or muffins. “Though the result may vary slightly by recipe, you can use a one-to-one substitution of avocado for butter, however when substituting avocado for oil it may be necessary to add another liquid to balance the recipe and "thin out" thicker batters or mixes.”[1]

To me, nothing says summer better than popsicles. Here is a recipe for cool and creamy Avocado Popsicles.  I don’t have any fancy popsicle molds, so I simply use 5-ounce Dixie cups with a wooden stick. Foil over the top of the cup helps to hold the sticks upright while freezing. This recipe takes about 10 minutes to prepare. I love the combination  of raspberries and avocados in a green salad, so I used those two flavors in this popsicle recipe. It’s so easy, but looks impressive. One popsicle is only 129 calories and provides a good source of protein, fiber, and vitamin C.
Step one is to blend together one ripe peeled and seeded California Avocado in a blender with honey and an individual container of coconut vanilla nonfat Greek yogurt and pour into cups (or a popsicle mold.  Cover with foil, insert wooden stick and freeze for 2 hours.


Step One

Step two is to blend together fresh or frozen raspberries with an individual container of raspberry nonfat Greek yogurt and then spoon this mixture over the top of the frozen avocado mixture. Top with foil and freeze for 2 hours.
 
Step Two
 
Here is the complete recipe.

Avocado Raspberry Popsicles

Prep Time: about 10 minutes

Total Time: 4 hours, 10 minutes


Ingredients:

1 ripe Fresh California Avocado, seeded and peeled

1 tablespoon honey

1 5.3-ounce container toasted coconut vanilla nonfat Greek yogurt

1 5.3-ounce container raspberry or strawberry nonfat Greek yogurt

1 cup fresh or frozen red raspberries

4 5-ounce paper cups

4 flat wooden sticks


Instructions:


Step One:

 
Combine avocado, coconut vanilla yogurt, and honey in blender. Cover and blend until smooth. Divide mixture evenly among paper cups. Tap cups gently on counter to make avocado mixture even within cups and to eliminate any air pockets. Cover cups with foil and insert stick into center of each cup. Freeze for 2 hours or until completely frozen.


Step Two:

 
When first layer is frozen, remove foil from pops. Combine strawberry yogurt and raspberries in blender. Cover and blend until smooth. Spoon mixture into each cup over the frozen avocado layer. Again cover cups with foil with sticks poking through center. Freeze until completely frozen, about 2 hours.

 
To eat, peel off paper cups. Enjoy.

 
Serves: 4


Nutrition Information per serving:

 
129 calories, 5 g total fat, 1 g saturated fat, 3 g monounsaturated fat, 1 g polyunsaturated fat, 5 mg cholesterol, 28 mg sodium, 302 mg potassium, 14 g total carbohydrates, 4 g dietary fiber, 9 g total sugars, 9 g protein, 1.2% DV vitamin A, 18.5% DV vitamin C, 8.7% DV calcium, 2.5% DV iron, 0 % DV vitamin D, 9.2% DV folate, and 0.04 g omega 3 fatty acids.

Click here to download and print a copy of this recipe.

Check out these other avocado summer delights.


Sunday, July 21, 2013

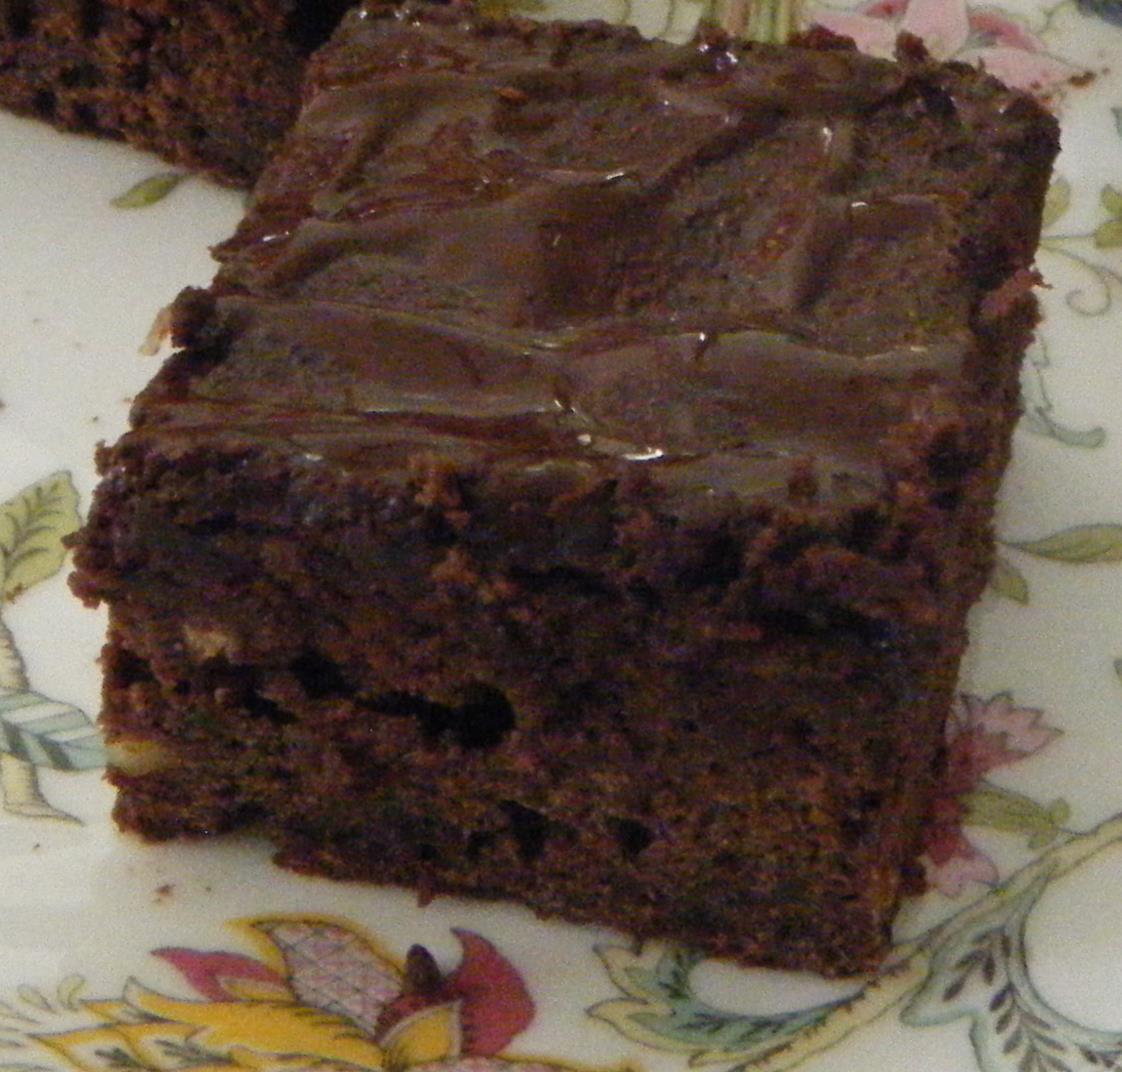
EZ Bean Brownies A Favorite for Travel

EZ Bean Brownies Great for Snacking


The theme for Recipe Redux this month is “Have Snacks. Will Travel.” Thanks to Karmen Meyer @Nutrition Adventures for this month’s inspiration!


For me, my definition of a good travel snack is a snack you can eat with one hand, not need tons of napkins to eat it, and is best if it has dark chocolate in it.


One of my favorite snacks is brownies but I don’t just prepare a packaged mix as directed. I substitute a can of rinsed black beans for the oil. By substituting canned beans for the oil normally called for on the package, this recipe saves 20 calories and 4.3 g of fat per brownie and adds additional fiber and protein. And it costs only $0.18 per serving.


Here’s the EZ Bean Brownie recipe:


E-Z Bean Brownies

Ingredients:


1 15 oz. can cooked beans, drained and rinsed well (I use black beans or dark red kidney beans)


2 large eggs


¼ cup water


1 19-1/2 oz. package chocolate fudge brownie mix


1/4 cup bittersweet 60% cocoa chocolate chips


Directions:


Preheat the oven to 350°F. Line a 9 X 9-inch baking pan with foil; then spray with nonstick cooking spray and set aside. Place the drained beans in the bowl of a food processor; process until smooth and creamy.  In a large bowl combine the pureed beans, eggs, water, and brownie mix; stir just until smooth, about 50 strokes.  Pour the batter into the prepared baking dish and bake 30 to 35 minutes, or until the edges start to pull away from the sides and a toothpick inserted in the center comes out clean. Top cooked brownies with chocolate chips as soon as remove from oven. Spread in even layer with spatula. Let cool completely. Lift out of pan and cut into squares.


Makes 20 Servings


Nutrition Information per Serving (1/20 of recipe):


150 calories, 3.8 g total fat, 0.6 g saturated fat, 0 mg cholesterol, 1.6 g dietary fiber, 3.0 g protein, and 134 mg sodium.


Cost per Serving (1/20 recipe): $0.18


Pricing Note: all ingredients were at “regular” prices except for the brownie mix (on sale for $1.50 a box).


Plate of EZ Bean Brownies

Click here to download and print a copy of this recipe.


Be sure to check out these other healthier snack recipes from fellow dietitians.

Friday, June 21, 2013

Stuffed Mushrooms with Hemp Seeds


Stuffed Mushrooms with Hemp Seeds

The theme for Recipe Redux for June is Sowing Seasonal Seeds. Thanks to Sanaa @Fit & Fancy for this theme inspiration. Seeds for this month’s feature can be sesame seeds, chia seeds, sunflower seeds, or any kind of seed. Our task is to develop and share a recipe using seeds reflecting the season in our part of the world.

 
I live just a few miles from Kennett Square, known as the mushroom capital of the country. This includes many varieties of exotic mushrooms, as well as the more traditional white button mushroom. For this month’s challenge, I decided to create a stuffed mushroom appetizer and to use hemp seeds as part of the filling. Hemp seeds add a nutty texture to foods.

 
I am fairly new to using hemp seeds. Other than adding them to my oatmeal some mornings, I haven’t used them much in cooking. I recently bought a large bag of hemp seeds from my local Costco. Hemp Hearts (brand name) are raw, shelled hemp seeds from Canada.


Package of Hemp Hearts from Canada


According to the Nutrition Facts panel on the package, one serving is 3 tablespoons and provides the following:

170 calories

13 g fat

1.5 g saturated fat

10 g polyunsaturated fat

1.5 g monounsaturated fat

3 g carbohydrate

3 g fiber

10 g protein

110% manganese

45% magnesium

25% thiamin

20% iron

20% zinc


So, you can see than hemp seeds can help boost your intake of several important fatty acids and good fats, protein, and several minerals.


Try using hemp hearts in a variety of foods:

·         Blend in smoothies

·         Add to hot or cold cereals

·         Sprinkle on salads, yogurt, soups and ice cream

·         Add to baked goods

·         Use them in a trail mix

·         Use as you would sesame seeds


Fun Fact: Hemp is an extremely versatile plant used for: Nutrition, construction material, clothes, paper, jewelry and alternative fuel.


 For 100 hemp recipes, visit: http://www.manitobaharvest.com/recipes.html

 
Here’s my recipe:


Stuffed Mushrooms With Hemp Seeds


Ingredients:

1 10-oz package baby portobello mushrooms (about 12 small mushrooms)

1 Tbsp butter

3 Tbsp finely chopped onion

1 clove garlic, peeled and minced

1/4 cup reduced fat feta cheese, crumbled

1 Tbsp balsamic vinegar

3 Tbsp raw shelled hemp seeds (such as Hemp Hearts)

1 Tbsp fresh thyme leaves

1 Tbsp fresh basil leaves, finely chopped


Directions:

Preheat oven to 350 degrees. Carefully remove stems from mushrooms. Place mushroom caps in single layer in baking dish that has been sprayed with non-stick spray. Finely chop the mushroom stems. Melt butter in large non-stick skillet over medium heat. Add chopped mushroom stems, onions, and garlic and cook for 4 minutes, or until onions are soft. Add feta cheese and vinegar, stirring until well blended. Remove from heat. Stir in hemp seeds, thyme and basil. Carefully spoon the mixture into the mushroom caps. Bake for 20 minutes. Serve hot.

Makes 12 stuffed mushrooms.

Note: White button mushrooms can also be used in place of portobello mushrooms, if desired.

Nutrition Information (1/12th of recipe):

38 calories, 2.6 g total fat, 1.0 g saturated fat, 3.5 mg cholesterol, 0.8 g dietary fiber, 2.2 g protein, and  46.3 mg sodium.

Cost per Mushroom Serving: $0.42 each (or about $5.08 for whole recipe)

Pricing Note: all ingredients were at “regular” prices except mushrooms were on sale for $3.49 per package.

 Here are some photos of the preparation of the stuffed mushrooms.
 
Top: Remove stems w/ strawberry huller; Middle: hemp mixture; Bottom: mushrooms in pan before baking.


Click here to download and print a copy of this recipe.


Saturday, June 8, 2013

Honey Sweet & Spicy Chicken Great for Easy Entertaining

Honey Sweet & Spicy Chicken


Disclaimer: By posting this recipe (below) I am entering a recipe contest sponsored by National Honey Board and am eligible to win prizes associated with the contest. I received a gift card to offset the expense of my ingredients.

Honey adds a wonderful sweetness to this recipe. Additionally, honey makes a perfect thick rub when combined with several flavorful spices that adheres to the chicken. The honey provides balance to this main course dish, countering the hotness from the dry ginger and chipotle and chili powders. Because honey attracts and holds moisture, it makes the cooked chicken breasts very moist and tasty.

This recipe is perfect for entertaining as it can be prepared ahead of time and refrigerated up to a day ahead. It goes together very quickly. Once assembled, you then put it in the oven for a carefree, main course. It’s perfect for entertaining when you want to be able to spend more time with your guests. And the recipe can be doubled or tripled to feed a hungry crowd.

I was inspired to make this recipe from a honey-paprika chicken with roasted oranges recipe developed by J.M. Hirsch that I read about last May in my local newspaper. I differed from Hirsch’s recipe in several ways. I used two large chicken breasts with skin and ribs instead of boneless chicken thighs, half as many oranges, sweet paprika instead of smoked paprika, less salt, replaced the cumin with ground chipotle pepper, and used chicken broth instead of white wine or orange juice.

The National Honey Board has made it easy to find honey varietals in your area. Click on www.honeylocator.com to find the varieties in your region.

Here is the full recipe.

Honey Sweet & Spicy Chicken
Prep time: 10 minutes
Cooking time: 40 to 45 minutes

Ingredients:
Non-stick cooking spray
2 navel oranges
1/4 cup sweet paprika
2 Tbsp garlic powder
2 tsp chili powder
1 tsp ground dry ginger
1/2 tsp ground chipotle pepper
1/4 tsp salt
1/4 cup honey
2 Tbsp low sodium chicken broth
2 large chicken breasts with skin and ribs (2-1/2 to 3 lbs total)

Directions:
Heat oven to 375 degrees. Spray a roasting pan with non-stick cooking spray. Slice off and discard the ends of each orange. Cut each unpeeled orange crosswise into 3 thick slices. Arrange slices in a single layer on bottom of roasting pan. In a small bowl, combine paprika, garlic powder, chili powder, ginger, chipotle pepper, and salt. Stir in honey and broth to form a thick paste. Spread paste thickly and completely over all sides of chicken breasts. Place coated breasts directly on top of orange slices. Roast for 40 to 45 minutes or until chicken reaches an internal temperature of 165 degrees. Cut each chicken breast in half. Carefully squeeze cooked orange slices over chicken using tongs.

Makes 4 servings.

Note: Recipe can be doubled or tripled to yield more servings.

Nutrition Information per Serving: 269 calories, 4 g total fat, 1 g saturated fat, 76 mg cholesterol, 5 g dietary fiber, 28 g protein, and 313 mg sodium. One serving of this low cost recipe provides an excellent source of vitamins A, C, niacin, and B-6, protein and fiber.

Cost per Serving: $1.99 Pricing Note: all ingredients were at “regular” prices except chicken breasts which were on sale for $1.99 per pound and oranges were on sale for $3.99 for a 4-pound bag.


Click here to download and print a copy of this recipe.

Be sure to check out these other honey-inspired dishes.

Tuesday, May 21, 2013

Shredded Vegetable Galette Perfect for Spring Brunches

Shredded Vegetable Galette

The theme for Recipe Redux this month is to think healthy brunch fare. Whether it’s for a graduation party, bridal shower, baby shower, or whatever, Spring is a great time to get together with family and friends and celebrate.

I decided to make a “healthy” hash brown potato dish. I started with fresh grated potatoes and added two other shredded vegetables – carrots and beets. The beets give this dish a beautiful deep red color. I call it a shredded vegetable galette.

Galette is a French term used for any type of flat, round, or freeform crusty cake or tart. This potato dish is cooked in a large non-stick skillet and comes out round. There is no pie crust as you may see with some galettes. The “crust” comes from the browned shredded potatoes and other vegetables. You can eat this Shredded Vegetable Galette “as is” or top each serving with a dollop of nonfat Greek yogurt or you can serve the galette with a tossed green salad. For me, this galette is a main course but you might prefer to serve it as a side dish. You can also add diced ham or bacon bits to make it meatier. You could also stir in a couple of beaten eggs for a more frittata-like texture.

Here is the full recipe.

Shredded Vegetable Galette

Ingredients:
4 cups shredded raw peeled vegetables, such as 2 cups shredded potatoes, 1 cup shredded carrots and 1 cup shredded beets) (use large holes of shredder)
1/2 cup coarsely chopped cooked garbanzo beans, or cooked beans of your choice
1/3 cup diced onion 1/3 cup cornmeal or almond flour or whole wheat flour
1 teaspoon caraway seeds
1 teaspoon ground black pepper
1/4 teaspoon salt
1 Tablespoon canola oil

Directions:
Combine the first eight ingredients together in a large bowl; mix well. Heat oil in large non-stick skillet over medium heat; swirl pan to spread oil evenly over bottom of pan. Add vegetable mixture, pressing firmly into pan with back of a large spoon. Cook, undisturbed, for 8 minutes. Remove from heat, cover and invert onto platter. Slide back into skillet. Cook remaining side until crisp and slightly brown, about 8 more minutes. Remove to platter and cut into fourths.

Serve with microgreens or mixed green salad, if desired.

Makes 4 servings.

Nutrition Information per Serving:
222 calories, 5 g total fat, 0 g saturated fat, 0 mg cholesterol, 12 g dietary fiber, 6 g protein, and 286 mg sodium. One serving of this low cost recipe provides an excellent source of fiber, vitamin A and folate.

Cost per Serving: $0.47
Pricing Note: all ingredients were at “regular” prices.

Click here to download and print the full recipe.

Here are some preparation photos.

Preparation of Galette

Here are photos of the galette cooking.

Cooking of Galette
Here is a single serving.
Single Serving of Galette

Be sure to check out these other healthy ideas for brunch.
get the InLinkz code

Sunday, April 21, 2013

Dark Chocolate Zucchini Cupcakes Filled with Goodness

Dark Chocolate Zucchini Cupcakes

Cupcakes are all the rage.

I confess, I don’t make cupcakes very often. In fact, I generally don’t make cakes and pies unless it’s a special occasion. So the challenge this month for Recipe Redux is to think cupcakes or individual desserts.

I decided to see if I could make a somewhat “healthier” cupcake. However, I wanted to start with the convenience of a package mix. I started with a package of dark chocolate fudge brownie mix. But, instead of 3 whole large eggs, I substituted 3/4 cup of silken tofu (1/4 cup for each egg). And, instead of 1/2 cup vegetable oil, I substituted 1/2 cup unsweetened applesauce.  I also added 1 medium zucchini, shredded, to the uncooked batter. Lastly, I added ground cinnamon to the dry brownie mix as well as to the chocolate cream cheese frosting, as cinnamon is a great complement to chocolate.

Here is a comparison of the brownie mix prepared as directed on the package and my version (with tofu, applesauce,  zucchini, and cinnamon). You can see from the chart, that there is a significant savings in calories, total fat, saturated fat, and cholesterol.

 
original brownie mix, prepared as directed w/ 1/2 cup oil and 3 large eggs
dark chocolate zucchini cupcakes (without frosting)
difference
Calories
327
257
70 calories; 21% reduction
Total Fat
19 g
10 g
9 g; 47% reduction
Saturated Fat
4 g
2 g
2 g; 50% reduction
Cholesterol
68 mg
29 mg
39 mg; 57% reduction

 These cupcakes are very dense and sponge-like; not like brownies that tend to be chewier and drier.


Here is the complete recipe, including a dark chocolate cream cheese frosting, which is optional.

Dark Chocolate Zucchini Cupcakes

Ingredients:

Cupcakes:

1 19.9 oz. package dark chocolate fudge brownie mix

1 teaspoon ground cinnamon

1-1/4 cups shredded zucchini (1 medium zucchini, about 7 inches long)

1/2 cup unsweetened applesauce

3/4 cup silken tofu

1/4 cup water


Chocolate Cream Cheese Frosting:

4 oz. one-third less fat cream cheese, softened

2 Tablespoons unsalted butter, softened

2 cups unsifted powdered sugar

1/4 cup cocoa powder

1/2 teaspoon ground cinnamon

1 teaspoon vanilla extract

Directions:

Heat oven to 350 degrees. Grease bottom of muffin tins or use non-stick cooking spray.

Combine brownie mix and cinnamon in a large bowl; set aside.

In a medium bowl, combine zucchini, applesauce, tofu, and water; mix to break up tofu into small pieces.  Gently stir zucchini mixture into the brownie mixture, stirring just to blend all ingredients.  Fill muffin cups about 3/4 full. Bake about 20 to 25 minutes, or until toothpick inserted in center comes out clean. Let cool 10 minutes. Using a butter knife, lift cupcakes from pan. Let cool completely. Store tightly covered.

Frosting: combine all ingredients in a medium bowl. Spread on cooled cupcakes.

Makes 14 cupcakes.

Note: Since most cupcake tins typically make 6 or 12 cupcakes, use greased small custard cups for remaining 2 cupcakes or refill cupcake tin after first batch comes from oven.

Nutrition Information per Cupcake (without frosting):

257 calories, 10 g total fat, 2 g saturated fat, 29 mg cholesterol, 0 g dietary fiber, 4 g protein, and 167 mg sodium.

Nutrition Information per Cupcake (with frosting):

365 calories, 14 g total fat, 4 g saturated fat, 38 mg cholesterol, 1 g dietary fiber, 5 g protein, and 199 mg sodium.

 Cost per Serving: $0.24 (without frosting); $0.41 (with frosting)

Pricing Note: all ingredients were at “regular” prices except the brownie mix which was on sale for $1.49.

Click here to download and print a copy of this recipe.

Be sure to check out these other cupcake recipes.
get the InLinkz code